Showing posts with label grafting. Show all posts

Monday, February 6, 2023

Looking inside a pecan graft union


      Whenever I remove a pecan tree, I like to save the portion of the trunk that contains the graft union. After drying a few weeks, I slice open the trunk with a band saw hoping to reveal the anatomy of the graft.  This winter I got lucky. In the photo above, you can see every step I took in placing a bark graft on this tree.

     As you look at the photo, note that the color of the wood is distinctively different between scion and stock. Wood growing from the scion is lighter in color than the wood of the stock. A distinctive color boundary between scion and stock extends across the entire trunk. Even though scion and stock grow together seamlessly, they remain genetically separate and never mix. This is graphically illustrated in the photo by the sliver of light-colored scionwood that dives deep into the stock. This inclusion of scion into the stock is exactly where I inserted the grafting wood under the bark of the stock (even the staples are visible).  


      I've always been fascinated by the grafting process and how that process is reflected in the grain of the wood. The photo above shows a hall table I built using pecan boards cut to reveal a graft union. The left side of the table is Giles rootstock while the right side is the cultivar, Osage. Note the distinctive brown line that cuts across the table indicating the boundary between scion and stock. In this example, the rootstock wood is lighter in color than the Osage wood grafted on top.


Thursday, May 12, 2022

Grafting time

Preparing a scion for grafting
     During a normal year, I usually starting grafting pecan trees during the first week of May. However, last week (the first of May) we received over 7.5 inches of rain during the course of the week and the Neosho River spilled over its banks flooding a large part of my pecan grove. Needless to say, my 2022 grafting season got off to a late start. 

    This week, summertime temperatures and ample sunshine dried the fields enough to make getting out in the field to graft trees possible. One of the biggest mistakes novice pecan growers make in grafting trees is  attempting to place a graft on a tree that is too small and does not yet have a well established root system.  My rule of thumb is to never graft a tree unless it grew at least 2 feet of new shoot growth the previous growing season.

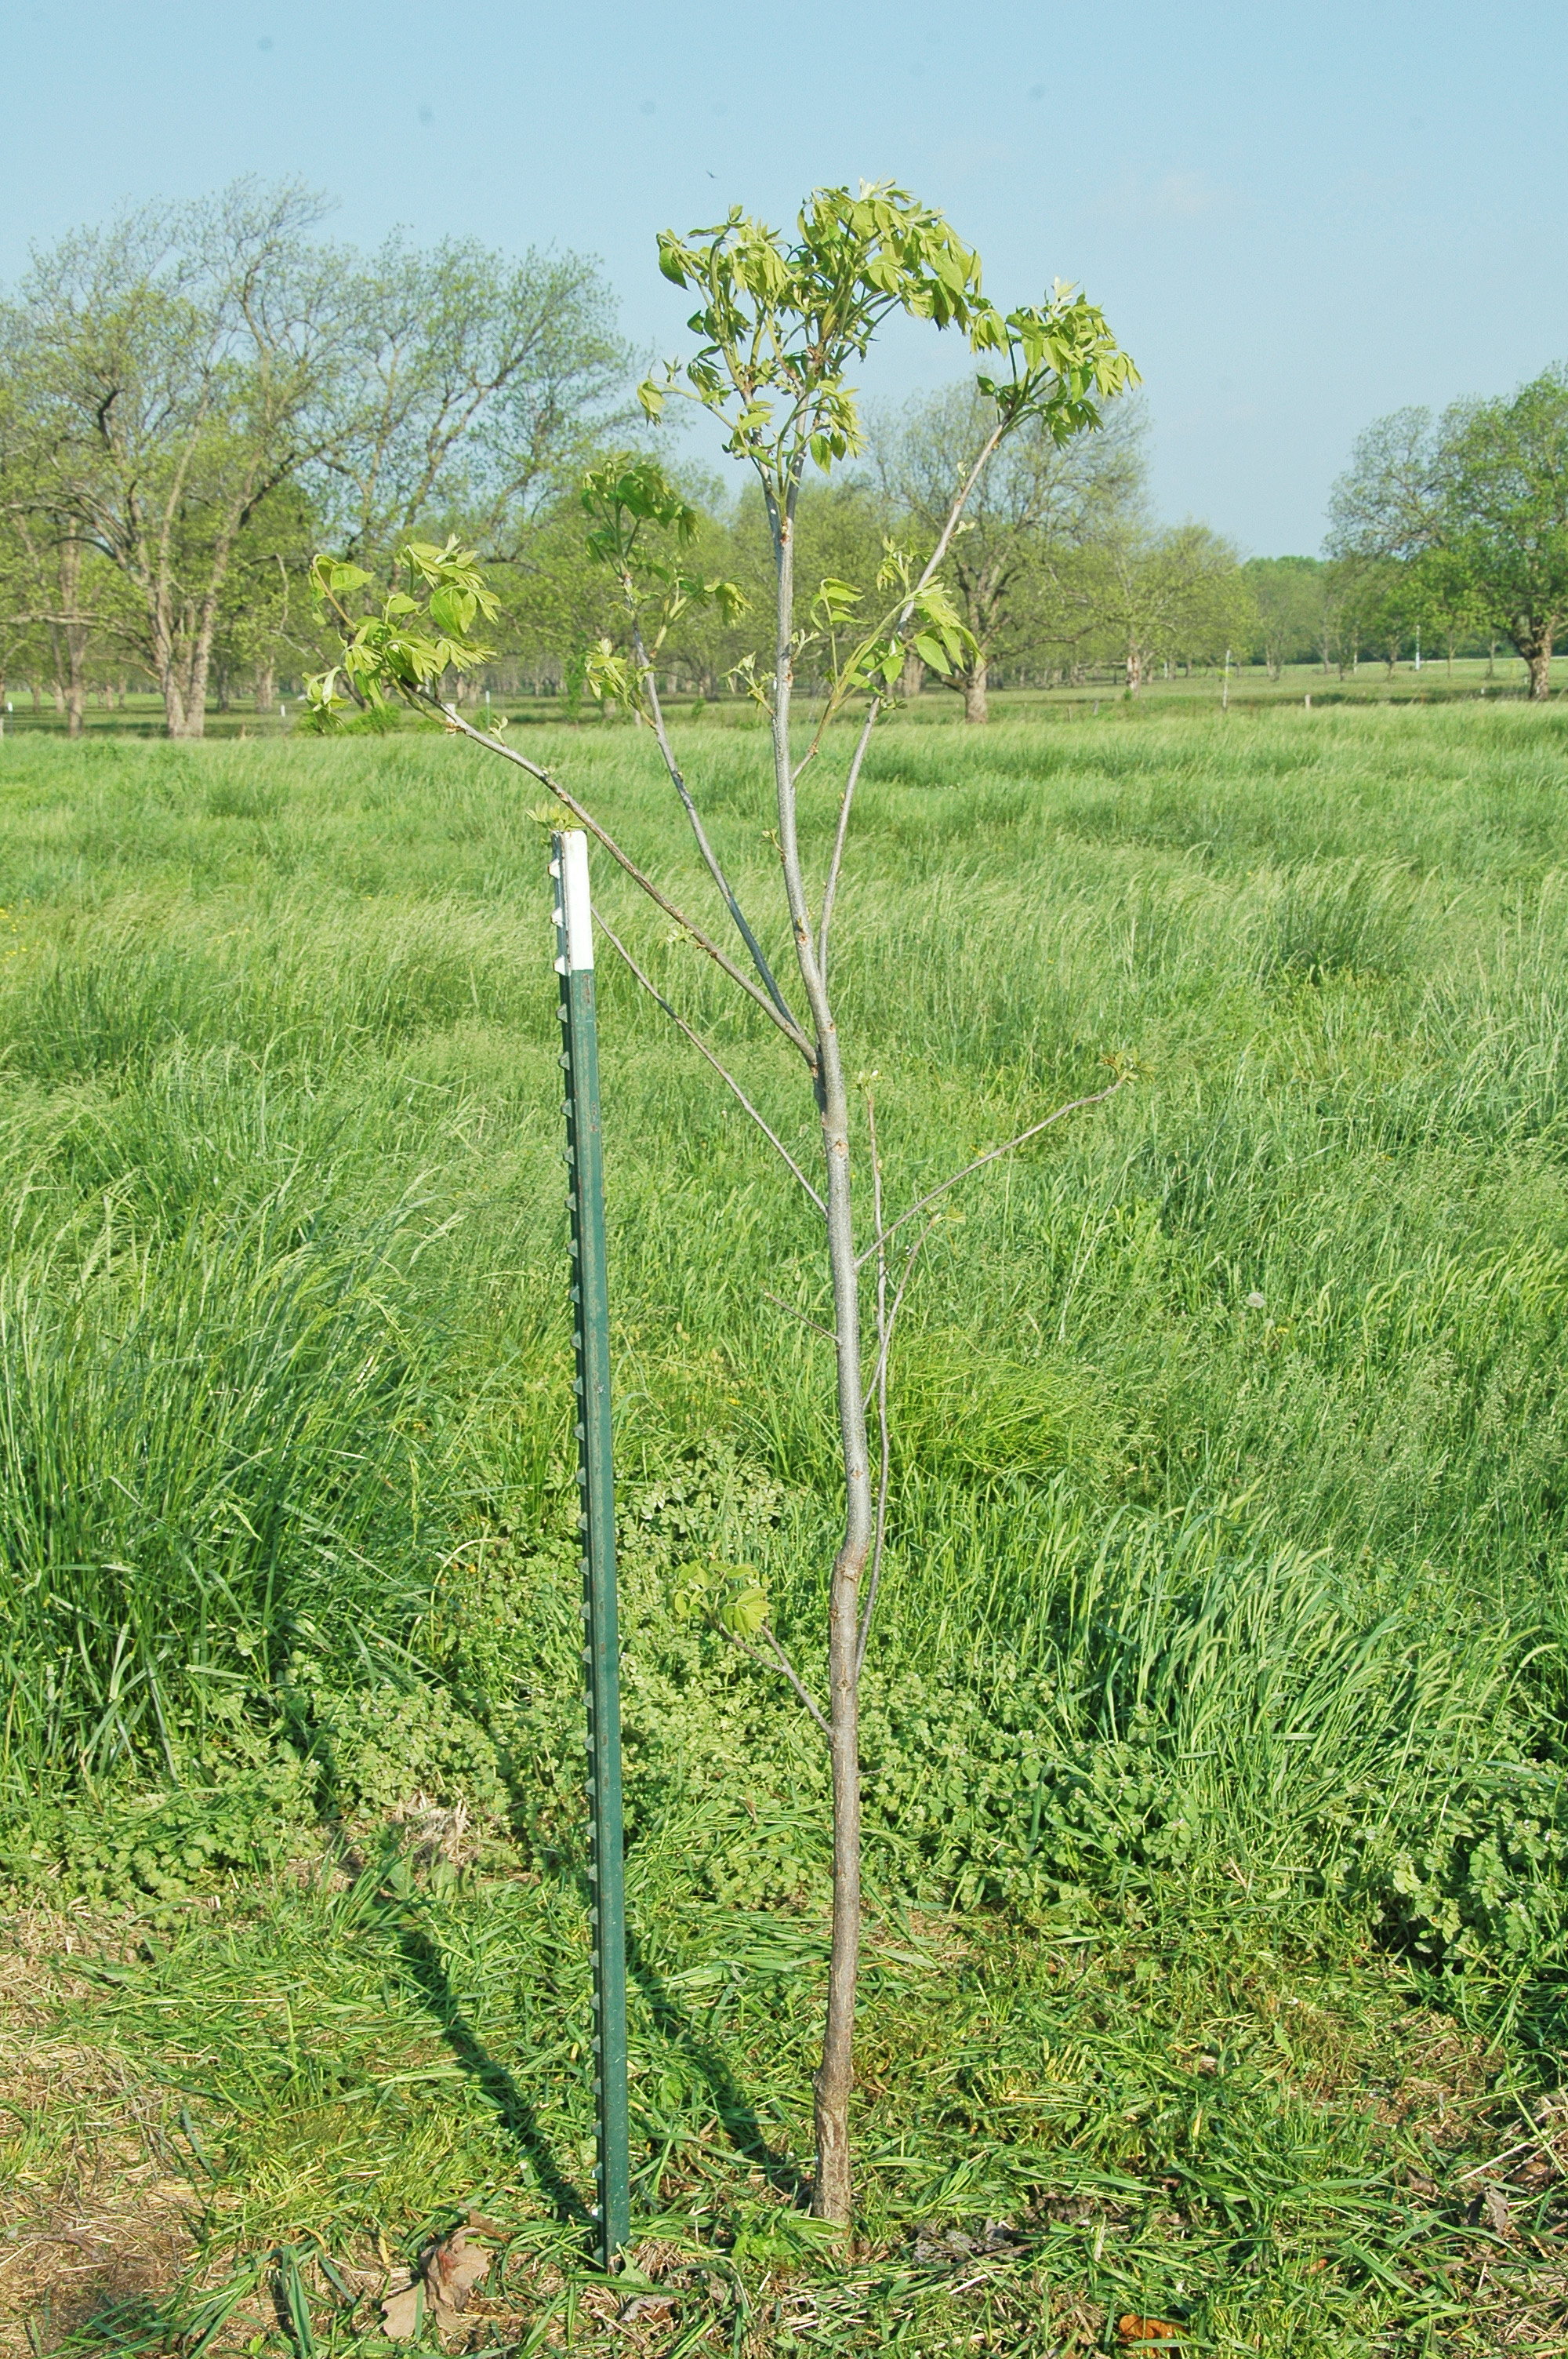
   The tree pictured at left is ideal for grafting. By the time a pecan tree has achieved this size above the ground, the root system is extensive and features a massive tap root.  


   I usually graft this sized tree at about 20 to 24 inches above to soil (photo at right). I choose this height for two reasons. First, 20 inches is a comfortable working height for me while I sit on my cooler to carve the scion and place the graft. Secondly, removing a majority of the top will force the tree to focus all its energy on pushing shoots that sprout from the scion. Ultimately, the rapid growth that results from such drastic pruning is easy to train into a strong central leader trunk.  

  The tree I selected for grafting is roughly one inch in diameter at the point I made the cut (photo at left). I like to use a bark graft in this circumstance. Once the graft starts growing it won't be long until new wood growth completely covers over the wound I made on the seedling rootstock.


    For a small diameter bark graft, I choose a small diameter scion to insert under the bark (photo at right). If you would like to see a more detailed discussion of how to make this graft, check out a previous post HERE.

   I always attach a bamboo stake to the tree after I've completed the graft (photo at left). Initially, this stake protects the scion from bird damage (perching birds can break off the scion). Once the scion breaks bud, I tie emerging shoots to the stake to train the new growth and to prevent wind damage. 

     This photo also reminds me that I've been using the same grafting box for 40 years. It has served me well.


     Deer populations in Kansas have exploded to the point where I never leave a young tree uncaged.  The cage protected the seedling the entire time it was growing into grafting sized tree. Once grafted, the cage will remain until the young tree has grown limbs well above deer browsing height.   At that point, I remove the cage and place a trunk protector on the tree to prevent buck rub.

Thursday, July 8, 2021

3-flap graft aftercare


     During the last week of June and the first couple of weeks of July, I try to visit every successful graft I made this year.  Pictured at right is a 3-flap graft made with a Kanza scion. The scion has made good growth but the rootstock below the graft has also sprouted several vigorously growing shoots. During this time of year, I like to prune off all rootstock sprouts and trim the scion down to a single shoot.

      Just by removing the rootstock sprouts, this graft looks to have made a good start towards growing into a strong central leader tree (photo at left). However, there remains a few more details that need attention.


    Earlier this Spring, the new shoot that sprouted from the scion terminated in a pistillate flower cluster (photo above left). The development of a flower cluster temporarily slowed the grow of the shoot but the terminal vegetative bud adjacent to the flower cluster eventually broke and started to grow. To promote the growth of that vegetative shoot, I pruned off the flower cluster (photo above right).

       In trimming the scion down to a single shoot, I made two additional cuts. The first was to remove a shoot developing from the secondary bud just below the main new shoot. And the second was to remove the stub above the new shot. By making an angled cut, I will encourage the rapid healing over of the cut at the top of the scion.

    To prevent the graft from becoming girdled by the grafting tape used to make a 3-flap graft, I remove all wraps from the graft at this time of year. Once the tape is removed you can easily see the flaps tightly attached to the scion (photo at right). You will also note white callus tissue growing in the cracks between the flaps. Also notice how this callus tissues causes the graft union to swell especially near the base of the graft. This is normal for 3-flap grafts. In a few years, the swelling at the graft union will disappear.

    Rapidly growing callus tissue is very susceptible to  sunburn and requires protection. To block the sun, I re-wrap the graft  union with aluminum foil and tie it on with grafting tape (photo at left). The grafting tape is tied just tight enough to hold foil in place so it can't be blown away by the wind.


    The final step in mid-summer graft care is to tie the new scion shoot to my tree training stake (photo at right). I use flagging tape to gently hold the shoot in place. Tying  the scion will prevent shoot breakage that can occur during strong summer storms.  The wire cage seen in the background of this photo will be placed over this young tree to prevent deer damage.


Monday, May 10, 2021

Grafting a frost injured tree

    In spite of a cooler than normal Spring, my pecan trees have started to re-bud following the April 21 frost. The photo at right show the terminal of a young pecan tree that is pushing out new green shoots from secondary buds just underneath frost-killed primary bud shoots. This was the signal I was waiting for to start grafting again.

   In choosing trees to graft, I select young trees that have made vigorous shoot growth the previous growing season. The tree pictured at left was about 6 feet tall and a perfect size for bark grafting. 

    When folks are just learning to graft pecan trees, they often wonder if there is a proper height to make the graft. When I graft, I choose the height based on two criteria. The diameter of the stock should be no larger than 3 inches in diameter and height should comfortable for making grafting cuts. On smaller trees, like the one pictured here, I'll cut off the stock at about 18 inches off the ground or at perfect height for me when sitting on my cooler to graft. On larger trees, I'll cut the stock at chest high to make grafting while standing more comfortable. Either way, I always remove at least 2/3 of the stock tree's height to force the tree to accept my graft.

    Once I choose the approximate location for cutting the stock, I carefully inspect the trunk for any a major knots or pruning wounds. On the tree I've selected to graft, I found two pruning wounds on either side of the trunk (photo at right). Underneath those wounds, the bark was nice and smooth, an excellent site for bark grafting.

    To make scion insertion under the bark easier, I cut the stock just below the two pruning wounds (photo at right).
    
    Once I prepare the stock by making a vertical incision in the bark, I turn to carving the scion. The photos at left show the cuts I make into the scion. The first cut is a deep cut to narrow the width of the scion to allow it to slip under the bark of the stock. Next, I make a shallow cut to expose the cambium on the back of the scion. This cut is made at an angle to deep cut. At a right angle to the deep cut I peel away a sliver of bark to expose cambium along the edge of the scion that will abut the verticle incision I made in the bark. My final cut is to carve a chisel point into the end of the scion to facilitate insertion under the bark. A detailed description of this grafting method can be found HERE.
  

  Once the scion is prepared I can quickly insert it into the stock and staple it into place. First, I place a row of staples up the incision of the bark. These are places at an angle so both sides of the staple sit firmly against the bark. Then I place a verticle row of staples just to the left of the scion to press the stock's bark up firmly against the shallow cut I made on the backside of the scion.
 

   To complete the grafting process, I wrapped the graft union in aluminum foil then covered that wrap with a plastric bag tied both on the scion and the stock (using green tape). I placed a drop of white glue on top of the scion to seal in moisture then attached a bamboo stake to the tree with electrical tape to prevent bird damage and provide support for the growing scion. My final step was to label the graft with an aluminum tag imprinted with the cultivar name.


     When completed, my grafted tree looks tiny compared to the stock tree I started with. In the photo at right, I layed the severed top of the tree next to the graft to give you an idea of how much I pruned off.  This may look like drastic surgery but when this graft takes, the new shoots will grow rapidly attemping to replace all that wood I pruned off. In addition, a fast growing tree is easier to train to central leader.


Sunday, May 2, 2021

Grafting after a late season freeze

     Most years I start grafting pecan trees around the first of May. The photo at right shows a young seedling pecan tree that is the perfect size to graft using a 3-flap graft. For field grafting, I use growth stage as a gauge for when grafting will be most successful. The tree in the photo has new leaves just starting to unfurl. The emergence of new leaves tells me that the bark will easily slip which is so important for 3-flap grafting.

    After 40 years experience in grafting trees, the first graft of the season went on perfectly (photo at left). If you need a refresher on how to make a 3-flap graft check out my post HERE. As always, I placed a bamboo stake next to the graft to provide a bird perch (prevents graft breakage from birds) and a support stake for the new growth that will emerge from the scion.


    However, much of my grafting will be delayed by the freeze we suffered on April 20. The photo at left shows one of many young trees that had their emerging buds frozen by the cold. The cold temperatures killed all emerging green tissue turning it brown. This shocks the tree into delaying further spring growth for at least a couple of weeks. As I said before, I like to wait until I see new green leaves before making a graft. 

    Following late spring frosts experienced in the past, I patiently waited until secondary buds on the young trees started growth. I ended up grafting a couple of weeks later than normal but I still had good success. I'm hoping this year will be similar.

    I took a close-up photo of a frost damaged seedling tree (photo at left). You will note that all of the primary buds on this stem were frozen. However, the secondary buds have already started to green up. The red arrows in the photo point to easily visible green buds.  These buds will take a little while to fully develop and break into new leaves but I expect to be grafting in 7 to 10 days. The speed of bud development will depend on the weather. Warm temperatures and sufficient rainfall should push thing along.
 

Monday, September 21, 2020

Bark graft snaps in the wind


    One of the bark grafts I made this past Spring died suddenly (photo at right). The graft was still standing up straight and tall but all the leaves had turned brown. This warranted closer inspection.


    I immediately focused in on the graft union (photo at left).  Even though I had painted the graft union white, I could see that the scion had been broken right at the very top of the stock. I carefully stake every bark graft but is obvious that I did not secure the stake tight enough to the tree to prevent the scion from rocking back and forth in strong winds. I had used black tape to secure the stake to the tree but upon inspection I found that I could wiggle the stake just enough to allow the breakage observed to the scion. In the future, I'll need to start bringing a cordless impact driver and wood screws to the field when installing stakes on bark grafts. Two screws placed through the stake and into the stock tree should help hold things rigid. 


     The breakage of this one graft encouraged me to start looking at other bark grafts I made this year. I was especially interested to see how each scion grew at the very top of the stock. The photo at right is typical. This scion appears to be trying to creep over the top of the stock. You can also see how  new tissue is forming up from the cambial layer of the stock to grab onto the side of the scion. At this point, the scion can still break easily unless it is help firmly in place with a strong stake and plenty ties.


     I noted that bark grafts applied to 1 to 1.5 inch diameter stock trees can close over the grafting wound very quickly. The tree pictured at left was grafted this year and has nearly grown completely over the stock wound. 

    I've been grafting pecan trees for 40 years now. Every year presents a new set of challenges to overcome and lessons to learn. It is a good thing I've got plenty of young seedling trees coming along to teach me even more lessons about pecan grafting in the future.


Monday, August 3, 2020

Pecan bark graft - The first year in pictures

25 April 2020, Bark graft set

   This year, I decided to photograph the growth and training of one bark graft that I made this Spring. I'll be adding to this post as the season progresses so you can see every step I take in training the scion and pruning back the under-stock. The process began this year with a bark graft placed on a young tree on April 25th (photo at right).


17 May 2020, Bud swell

Three weeks after grafting, buds on the scion start to swell and green up (photo at right). This is a good sign for graft success. However, remember that there is often enough stored energy within the scion itself to push buds open even if the scion and stock haven't made a strong, growing connection. It is only when I see leaves expanding,  do I known the scion and stock have united fully.


25 May 2020, Leaf Expansion

    Four weeks after grafting, leaves are expanding on the new shoots growing from the scion (photo at right). At this point I am confident I have a successful graft.


1 June 2020, Shoot elongation

    With warm summer temperatures, the new shoots growing from the scion start elongating rapidly (photo at right).  Successful bark grafts usually grow 4-6 feet in height during the growing season.


8 June 2020, Graft training

    By the first week in June the graft has grown to a point where it is time to select one shoot to become the new central leader. In the photo at right, you can see that the scion has developed two strongly-growing shoots that are competing for dominance.
    At this point, I will begin the tree training process to promote the growth of the scion, limit the scion to a single growing shoot (new central leader), and install a larger tree-training stake. These steps are illustrated in the photos below.
Prune back growth below the graft to push scion growth, June 8th
Prune to one scion shoot, trim off top stub to promote healing. June 8th.
Remove tape to prevent girdling, June 8th.
Install 1 x 2 training stake, tie new growth with flagging tape to prevent wind damage. June 8th.


Scion 2 feet tall on 15 June 2020
15 June 2020, Remove stalked buds

    With all the tree's energy focused on a single shoot growth rate is rapid. At this point,  the scion shoot is nearly 2 feet in length. However, rapid shoot growth promotes the formation of stalked buds which lead to the formation of poorly attached lateral branches. My goal in training this scion is to maintain a single, branch-less shoot during this first year of growth. I remove all stalked buds on the scion shoot as they appear during the summer months. The photos below illustrate the appearance and removal of stalked buds.
Stalked buds form on rapidly growing scion (red arrows), 15 June 2020


Scion shoot nearly 3 feet tall on 1 July 2020
1 July 2020,  More tree training

    By the 1st of July, the scion shoot is nearly 3 feet tall. New, upright-growing shoots have sprouted from the lower support limbs that can compete with the scion for light and nutrients. To maintain the tree's focus on growing the scion, I will prune off all upright-growing shoots competing with the scion and prune back the support limbs. To further train the scion shoot, I remove all newly-formed stalked buds and tie the new growth to the training stake. These steps are illustrated below.
  
Remove newly developed stalked buds from the upper portion on scion shoot. 1 July 2020.

Remove all new shoots that are competing with scion. 1 July 2020.

 Prune back support limbs to encourage more scion growth. 1 July 2020.

3 August 2020 scion shoot is now 5 feet tall
3 August 2020, Graft union painting and tree training

    During early August, I like to remove all the wrappings that cover the graft union and paint that area with white latex paint. By removing the plastic bag and aluminum foil, I can clean out any ant nests that have formed under the protection of the plastic. I use white paint for two reasons. First, to prevent sun-scald on a portion of the tree that has been covered since late April. And second, to mark the site of the graft union for easy identification for years to come.
    While I was attending to the graft union, I also pruned off any and all lateral shoots on the scion that have developed from stalked buds.  I also made just a few pruning cuts to the support limbs to remove low hanging branches. At this point in the season, I limit the pruning back of the support limbs to allow the scion shoot to start slowing down its growth rate. I don't want rapid growth to continue into the fall because that can lead to winter injury of the scion. 

All coverings removed from the bark graft.
Graft union painted white
Lateral shoots growing from primary buds on the lowest portion of the scion shoot will be removed

Stalked buds have developed and sprouted on the upper portion of the scion. These will all be removed.

Bark grafted tree before and after painting and training