Thursday, June 29, 2017

Time for pecan graft maintenance

    Today I was working on trimming and training this year's new grafts. The photo at right shows a young bark graft that has developed a nice strong shoot from the scion. However, this tree still needs some attention.
    Three weeks ago I forced new growth from the scion by pruning off all bark sprouts growing below the graft union. But now, you can see new bark sprouts have formed (note leaves with reddish coloration).
   So my first step in pruning this tree was to remove all stump sprouts (photo at left). Now, you can clearly see the graft union. My next step is to prune the scion's new growth down to one shoot.
  
    The photo at right is a close-up of the graft union. As you can see the scion has developed three shoots. The uppermost shoot (labeled A) is hardly sprouted out. I will remove this shoot by cutting the scion at the point marked by the red line. Next, I will remove the secondary shoot (labeled B) so that all the tree's energy will be directed to the much larger primary shoot that will become my new central leader.
    To prevent the grafting tape from girdling the scion, I'll remove the tape (labeled C) but leave the rest of the graft wraps on the tree at this time.

    After pruning the scion I'm left with a nice single stemmed tree (photo at left).  The slight crook in the stem will eventually disappear  as the new shoot grows in diameter. Before leaving this tree I always inspect the new shoot for the formation of stalked buds.
     I found  a stalked bud at nearly every leaf axil. In the photo at right, I pointed out all the stalked buds (orange arrows) on just a portion of the scion's new shoot.  Starting at the base of the shoot, I use my fingers to grab each stalked bud and pull them off the shoot. On this tree, I found stalked buds at every leaf axil over the entire length of the shoot.
   
Once the stalked buds were removed, I used some blue engineer's flagging tape (any color will work) to secure the new shoot growth to my bamboo training stick (photo at left). Now that I've pruned the scion down to one shoot, I want to do everything possible to prevent the wind from snapping off the graft. My final step in protecting this graft was to replace the deer cage back over the tree to prevent browsing damage.
   In about 3 weeks, this tree will need more attention. I'll need to prune off any new stump sprouts, remove stalked buds that develop on new growth and tie the new shoot to the stake as the tree grows in height.

Tuesday, June 27, 2017

Early signs of pecan scab infection

    We've had a fairly wet spring this year and along with the damp weather, pecan scab has made its early season appearance.  The photo at right shows a cluster of Giles nuts. Giles is a scab susceptible cultivar that must be protected with fungicide sprays in order to produce a harvestable crop.
   A quick look at the Giles nut cluster reveals just the smallest hint of scab infection, a very small black lesion on the upper left side nut. However, if you look at the leaf below the nut cluster you will numerous scab lesions appearing as black irregularly shaped spots.
   With plenty of scab spores up in the tree (coming from leaf lesions) we'll need a good fungicide program to protect the nut crop. We've sprayed once but additional sprays will be needed.

    On super scab-susceptible cultivars, like Hirschi,  the disease has already progressed to the nut crop. In the photo at left, a Hirschi nut (left nut) is already supporting a large scab lesion. You can also see scab lesions dotting the foliage. Historically we've had trouble controlling scab on Hirschi even with multiple fungicide applications. This year looks no different. Our Hirschi trees will receive the same spray schedule as the rest of the orchard but we'll probably lose most the nut crop from these tree due to scab.
   

Friday, June 23, 2017

What happened to my pecan tree's central leader?

    When I drove by my pecan grove the other day, I noticed a tree with a branch that had broken out in the wind (photo at right). At first glance , it looked like the central leader had snapped and I lost the top of the tree. So, I got out my 8 foot tall orchard ladder to take a closer look and the make some pruning cuts.
   Once I climbed up the ladder I could get a good look at the branch structure of this tree (photo at left). To my surprise the broken branch was not the central leader. What was once the central leader was bent over under the weight of an excessively bushy top.
  
     My first step in pruning up this tree was to remove the broken limb (photo at right). Next I needed to straighten up the leader (red arrow). At the same time, I needed to thin out the number of limbs that branched out from the trunk at nearly the same spot on the trunk. Rather than attach a training stick to the tree, I decided to use a lower branch (yellow arrow) to help retrain the tree. I chose this limb because it was leaning out in the opposite direction of the leader.
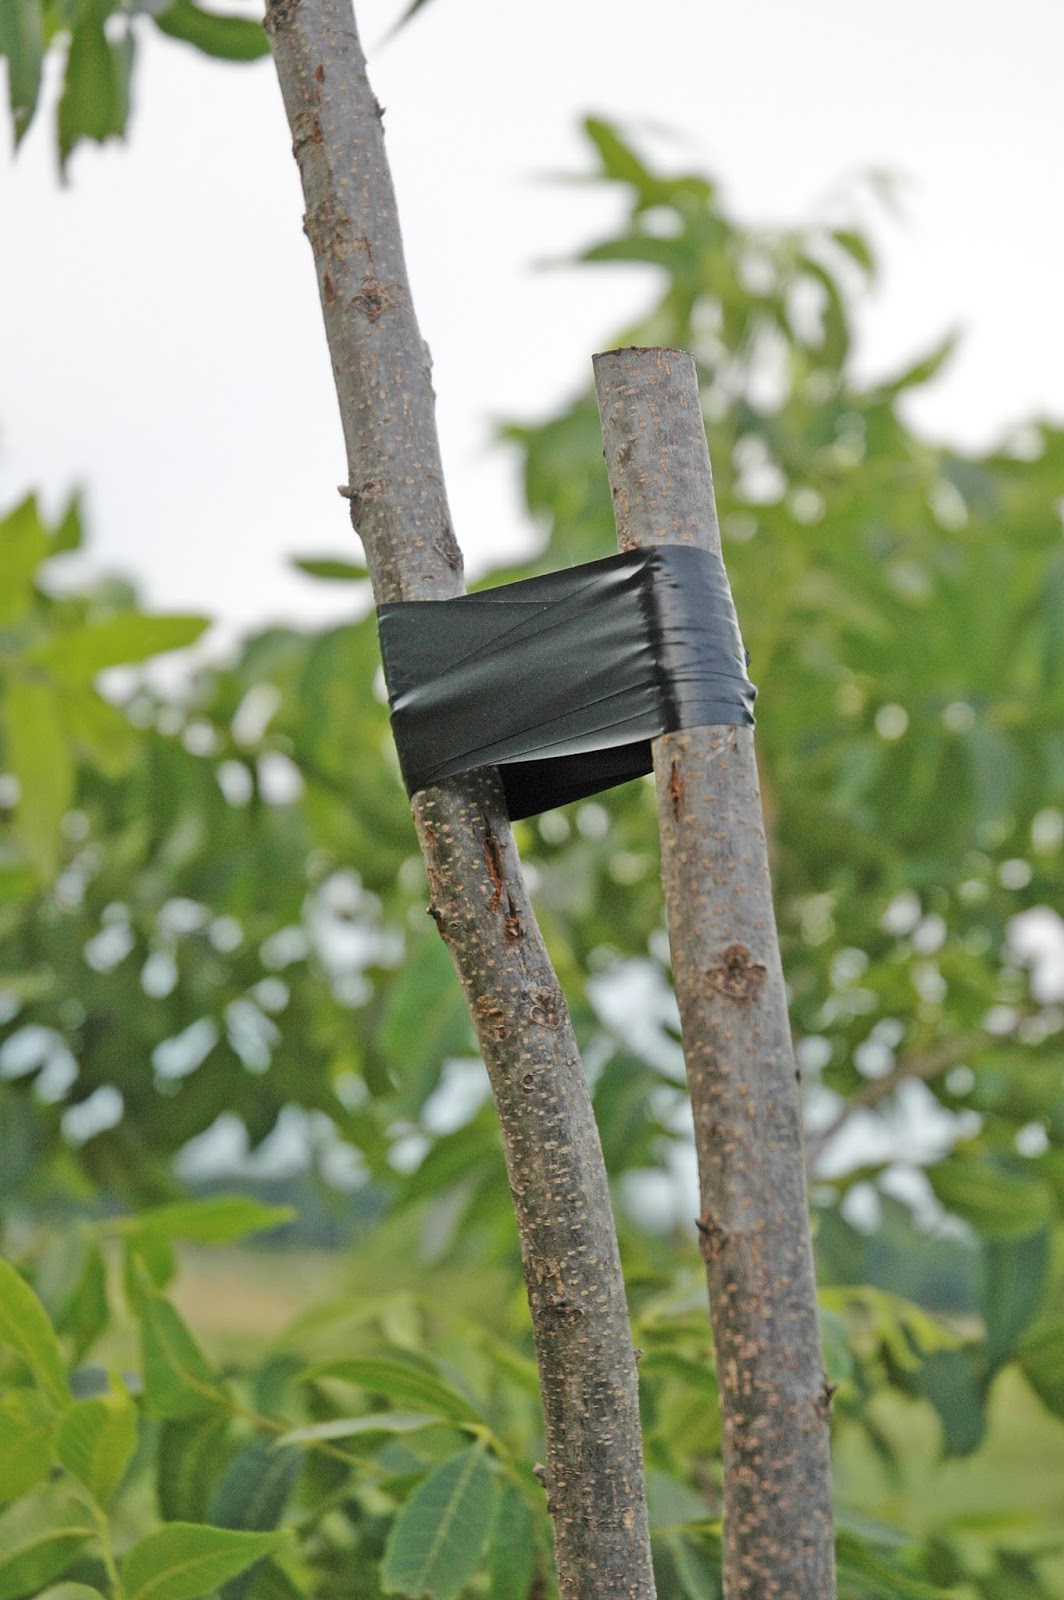
     I held both these limbs upright and taped them together using electrical tape (photo at left). I now had my leader pointing in the right direction. However,  I also had a training branch pointing in the same direction and in direct competition with the leader.

    I pruned off the top of the training branch just above the electrical tape (photo at right). This pruning cut immediately gave a sunlight advantage to the leader. However, the training branch would soon sprout new shoots so,  I decided to try a little old fashion trickery.
   At the base of the training branch, I girdled the branch (photo at left). I removed the bark from the branch from the point the branch attaches to the trunk upward for about 3 inches. Girdling a branch will not kill it immediately but will inhibit the movement of nutrients into the branch and seriously hamper shoot re-sprouting. However, the wood in the girdled branch will remain strong enough to provide support for the leader. After a year's time, the leader should gain in diameter and strength and  I can cut out the girdled branch completely.
   Next I turned my attention to the leader.  Each spring, a pecan tree will sprout 3 to 5 new branches from the terminal portion of last year's growth. This forms a growth pattern commonly known as a "crows foot". The photo at right shows that the leader of this tree grew a crows foot in both 2016 and 2017 (red circles). This growth pattern produced such a mass of foliage that the leader became top heavy and bend over from the weight.
    To make sure the leader would develop into a strong, upright-growing trunk, I needed to prune off all the side branches in this portion of the tree.
 

   In pruning the top of this tree, I removed both the 2016 and 2017 crow's feet (photo at left).  Suddenly, I've reclaimed a single central leader.

    Once I got through with redefining the top of the tree, I turned my attention to the side branches. I found that the lateral branches had sprouted so many new shoots this past spring that I needed to prune off some excessive leaf weight. I did that by first removing any new shoots sprouting straight upwards from a lateral limb. Next I headed back any new lateral shoot that had grown more than 2 feet in length.
    My biggest problem in making these pruning cuts is that I needed my 8 foot orchard ladder for every cut.  I guess that is the price I pay for grafting onto a fairly large rootstock tree and witnessing 5-7 feet of new growth each year. 
   

    It took me about 15 minutes to prune my tree with a broken branch. It seems most of my time was spent moving the ladder and climbing up and down. This fall (late Oct.) I'll prune out my training branch.
    

Tuesday, June 20, 2017

A new pecan graft can flower

    In grafting pecan trees, we take a piece of one-year-old wood collected from a mature pecan tree and place it on a seedling rootstock tree. If the scion was collected from a vigorous and healthy tree, that small piece of twig will be programed to produce both catkins and pistillate flowers.
   The photo at right is a Kanza graft I made this spring.  Hanging down over the plastic bag, that I use to wrap the graft union, are catkins produced by the scion. At the very top of the scion's new shoot growth is a cluster of female flowers.
  Whenever I see pistillate flowers forming on a new graft I usually pinch them off immediately. At this point in the tree's life, I want to encourage maximum vegetative growth. Female flower production on a new graft only serves to slow shoot growth. 

Monday, June 19, 2017

Spraying for scab

Spraying pecans (view from the tractor seat)
   With over 3 inches of rain falling over the weekend, it is high time we quit waiting on pecan nut casebearer and start concentrating on controlling pecan scab.  Today we fired up the sprayer and applied some Quilt Xcel fungicide. We sprayed the grove with our air-blast sprayer that applies roughly 100 gallons of water per acre of trees.  That makes figuring out how much chemical to put in the tank pretty easy.
    Read any chemical label and you'll find the rates of application given in amount of product per acre. Our sprayer has a 500 gallon tank or enough water to cover 5 acres. To determine the amount of product to be added to the spray tank, I just simply multiply the per acre rate by 5.  The recommended application rate is for Quilt is 14 oz. per acre. In filling our sprayer, I added 70 oz of Quilt to the spray tank.
   One word of advice abound spraying fungicides. Good disease is only achievable when the fungicide covers all plant surfaces. To get good spray coverage I always spray each tree from both sides. You should not assume that your air-blast sprayer is powerful enough to penetrate the entire canopy from just one side of the tree.

   We did include a insecticide in with our fungicide spray. We added Govern insecticide to the tank to control this summer's first hatch of fall webworm (photo at right). In scouting the orchard, we have found several colonies of first instar larvae. At this point in the webworm's live cycle they have done a minor amount of defoliation or have yet to hatch. Spraying an insecticide now should keep this insect out of our orchard until the second generation arrives in mid-August.   

Friday, June 16, 2017

This is why scouting for pests is so important

   For the past week, I've been expecting to see damage from pecan nut casebearer start to take off.  In fact, I have my sprayer filled with water and ready to go. The problem is, we can't find enough casebearer damage to justify spraying
   Three times per week we scout our orchard for signs of insect damage (photo at right). The results of each of our scouting runs can be found by clicking on the Pecan Nut Casebearer tab (The tab is located just below below this blog's header). We have yet to find more than 1% damage.
   In a normal year, we apply a fungicide to control pecan scab at the same time we apply an insecticide to control casebearer. Its now mid-June and we still haven't applied any pest control chemicals. So starting next Monday (June 19th) we are going to start spraying a fungicide to protect our pecans from scab.  If the casebearer population stays low, we won't be including an insecticide with this spray.
   In late June, we might see fall webworm or walnut caterpillar move into the grove. If these insects appear, we will include an insecticide in the spray tank when we make our second scab spray (around July 1).

Friday, June 9, 2017

Training a tree using the 2-foot rule

    A lot of the trees I grafted last year are growing vigorously this year.  Unfortunately, most of the new growth seems to be sprouting from the very top of the tree. Left unchecked, I'll lose the central leader among a profusion of new shoots. In addition, the tree would become top heavy and eventually droop over under the weight of shoots and leaves. The photo at right shows one of many trees in my orchard that need pruning attention this Spring.
    The ladder in the photo is 6 feet tall which gives you a good idea how fast this tree has grown. The graft union is about 2 feet from the ground and is painted white. Last year (the same year I grafted the tree), I trained the tree to a single central leader. The new graft responded by putting on over 6 feet of new growth in a single growing season. This Spring, buds all along the central leader broke and new shoots began to develop.   However, growth has been most aggressive at the top of the tree.
  
    My first step in pruning this tree was to climb the ladder  and search out the very top of last year's growth (photo at left). I was amazed by how many new shoots had developed at the top of the tree. Not only did primary buds break and start growing into new shoots but many shoots had grown from secondary buds.  Its no wonder this tree was looking so top heavy.
    After parting the foliage, I identified one upward growing shoot to become my central leader. At that point, I removed all competing shoots at the top of the tree. Here's where I use the first part of the 2-foot rule. Measuring down from the apex of my new central leader I pruned off all lateral shoots within the top 2 feet.
    By just removing competing shoots using the 2-foot rule, I've thinned out the top of the tree and regained a strong central leader (photo at right). But I'm not done yet.
    To slow the growth of lateral branches and encourage diameter growth on both trunk and branches, I employed the second part of the 2-foot rule. All lateral branches were tip pruned to two feet in length.

  In tip pruning the laterals, I always make sure to prune to an outward growing bud (photo at left). When lateral branches begins to regrow in 3 to 4 weeks,  several buds will break along the length of each branch and the lower portion of the tree's canopy will begin to fill out.
   It took me less that 5 minutes to prune this tree into the proper shape. The before and after photos above really illustrate how a few simple pruning cuts made using the 2-foot rule can totally reshape a young pecan tree.
    For more detailed information on training young trees and the 2-foot rule click HERE to begin reading my six part series.


Thursday, June 1, 2017

Prevent stump sprouts from shading new pecan grafts

   Over the past few days, I've taken advantage of cool morning temperatures to revisit the grafts I made a month ago (photo at right). During my orchard walk-thru, I decided to photograph several Kanza grafts that I made all on the same day in late April. The main purpose for visiting these trees was to remove stump sprouts and promote the growth of the scion.  However, in working with my trees, I noticed wide variations in scion growth and the proliferation of stump sprouts.  
    In the photos below, you will see seven successfully grafted trees before (left) and after (right) pruning. As you look over the photos, take note of a few things. First, the sprouts that are growing from the stock below the graft union have leaves with a reddish coloration. In sharp contrast, the leaves growing from Kanza scions are light green in color. Red pigmentation of emerging leaves is characteristic of juvenile pecan tissue.  The leaves growing from the Kanza scions originate from sexually mature tissues in the bud stick and are fully green.
    The second thing I noticed about these trees is that vigorously growing stump sprouts seem to inhibit the growth of buds on the scion.  Trees 5 and 6 had so much rapid shoot growth coming from below the graft that the buds on the scion were barely sprouting. And remember, all these grafts were made on the same day using Kanza scions.
    The differences in scion growth we see in the field are most certainly due to the natural variation in seedling rootstocks. Some rootstock trees will callus over a scion faster than others. Better and faster callusing will allow the scion greater access the the rootstock's energy reserves resulting in enhanced scion growth.
    Some rootstocks seem to produce more stump sprouts than others. Rapidly growing shoots produce plant horomones that retard the growth of other buds on the tree. This is why it is so important to prune off stump sprouts.
    I grafted over 100 trees this year. Looks like I'll spend a few more days pruning off stump sprouts.    

Tree 1


Tree 2


Tree 3


Tree 4


Tree 5


Tree 6


Tree 7