The weather the past several days has been great for grafting pecan trees. There is nothing better that spending time outdoors carving scions and placing grafts. In a
previous post, I've documented how I make a 3-flap graft but this year I took some photographs that I hope will shed additional insights into using this grafting technique.
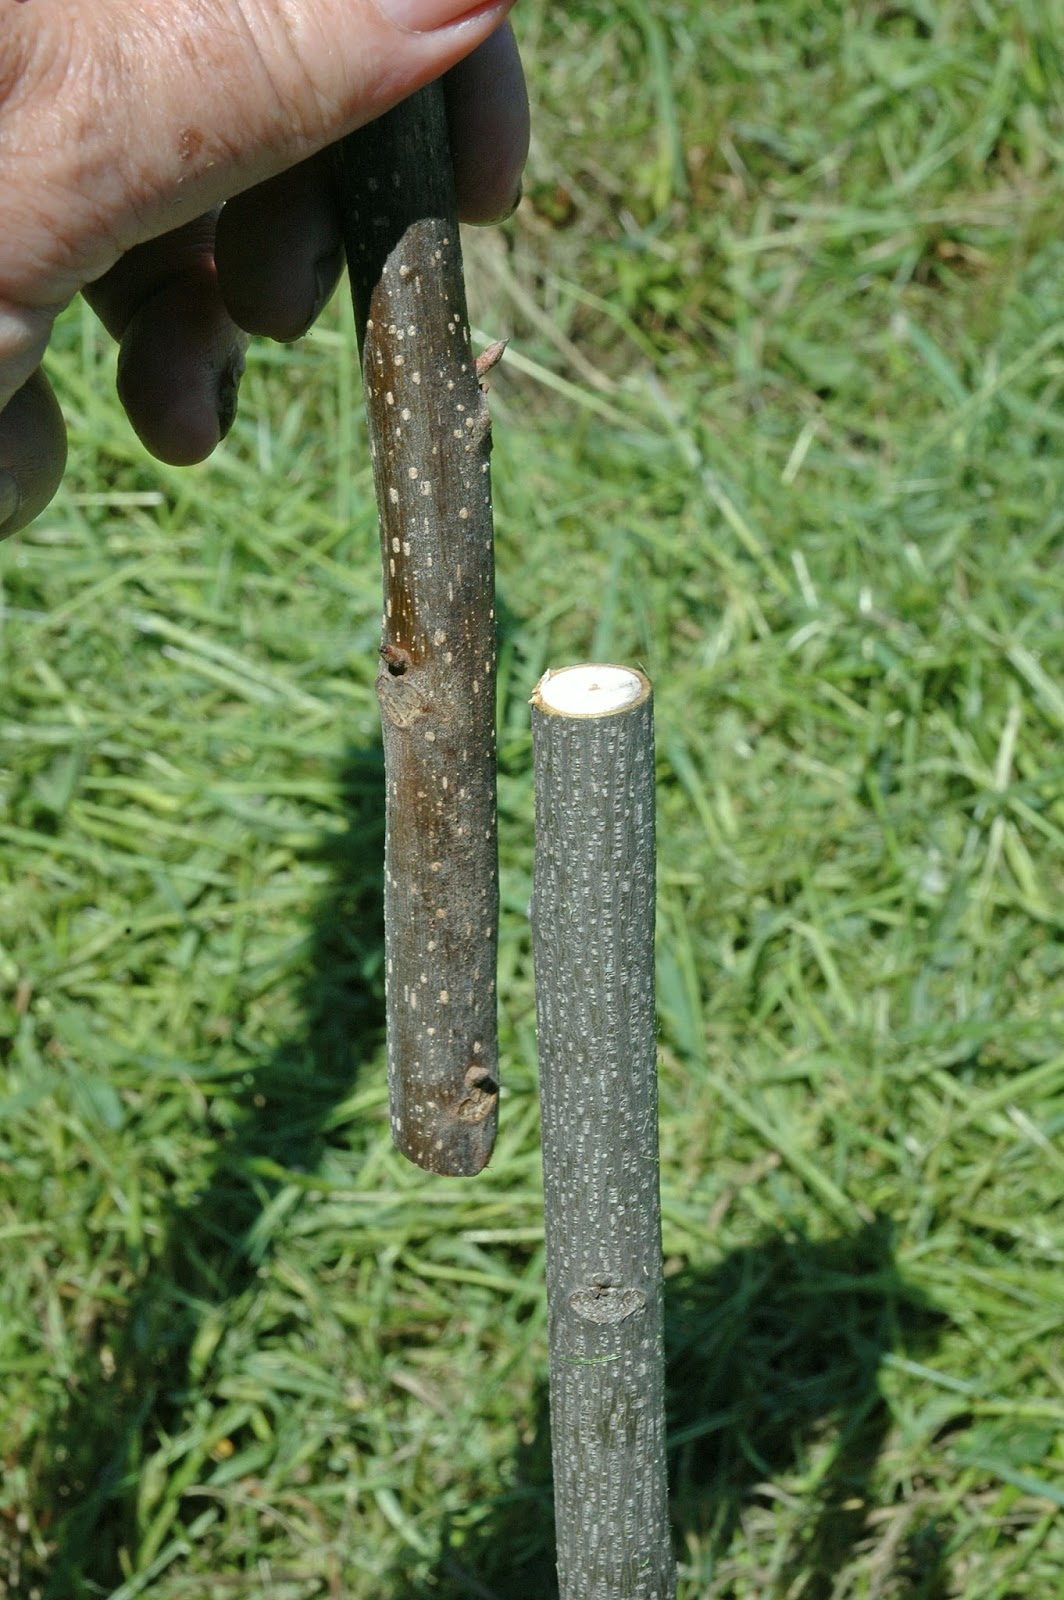
I use the 3-flap grafting technique exclusively on small pecan trees. The tree pictured above (on left) had a single stem and was about four feet in height. To encourage the tree to accept my graft, I cut the stock tree down to about 1/3 of its original height (above, right). Whenever I'm grafting, I always remove a significant portion of the stock tree's top growth to encourage the tree to accept the scion.
In the photo above, I'm holding the top portion of the stock tree I removed before grafting. As you can see, new shoots were emerging from tree indicating the the bark will slip and the time was right for grafting. In addition, my finger is pointing to the annual growth ring on this tree that marks the spot where growth started the previous growing season. The tree put on two feet of new top growth last year which indicates, to me, that the stock tree is ready for grafting and will force the scion to grow vigorously this summer.
In choosing a scion for a 3-flap graft, I try to match the diameters of scion and stock as closely as possible (photo at right). If I can't find a perfect match, I find it best to use a scion that is slightly larger than the stock (no more that 1/8 inch bigger).
One step in the grafting process that is easy to forget is trimming the bottom of the scion back to fresh green wood. In the photo at right (top photo), you can see what the bottom end of the scion looks like when taken out of the cooler. I always make sure to clip off about a quarter inch of wood off the end of the scion to reveal fresh, green wood (lower photo at right) . Remember, only living cambium tissue on the scion will unite with cambium tissue on the stock.
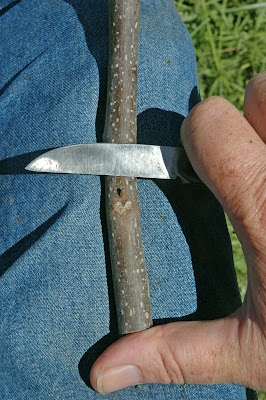
When it comes time to carve the scion, folks always ask me how long to make the peeling cuts. My answer has always been to let the dimensions on my hand determine the cut length. To start the cut, I always place my thumb on the bottom of the scion. Then, holding the knife firmly in my fingers, I stretch my hand outwards and place the knife blade on the scion (photo at right). I start the peeling cut at this point and remembering to move my thumb off the scion as I cut downwards. In all my of years of grafting, my hand has always been the same size and, as a consequence, all the cuts I make on the scion will be exactly the same length.

In carving the scion for a 3-flap graft, it is very important to cut deep enough to see white wood in the center of each cut surface. In making the three cuts, it is also important to make those cuts equidistant around the scion (photo at left). A properly cut scion should have 3 sides cut down to the wood with a strip of bark between each cut surface. Carving the scion correctly is critical for grafting success. Most 3-flap graft failures can be traced back to not cutting deep enough to expose cambium or cutting off all the bark thus removing all the scion's cambial tissue.

Inserting the scion into the stock and securing the flaps over the scion often causes frustration among novice grafters. I've discovered an easy way to complete this step without the help of a third hand. Before inserting the scion, I start wrapping grafting tape around the stock tree starting just below the base of the flaps. As I wrap upwards, the flaps are pulled together forming a tube of bark. At this point, I can hold the tape in place and use my other hand to insert the scion. The bark tube will seem a little small for the scion but that's good. Once I push the scion all the way down to meet the wood of the stock, the bark tube will hold the scion in place (as long as I keep holding the grafting tape tightly). At this point, I can continue wrapping the graft union without having to hold onto the scion. The graft wrapping process is pictured above.

After wrapping the graft with tape, I cover the graft union with aluminum foil and a plastic bag. The next step I take is to prevent wildlife damage to the graft. In the past, I always attached a bird perch to the graft to prevent scion breakage by birds. However, deer have become such a big problem in my area that I am now placing a cage over each young tree and new graft (photo at right). Left unprotected, browsing deer will eat shoots emerging from a new graft and usually break off the scion in the process. The deer cage has the addition benefit of protecting the tree from perching bird damage (birds prefer to perch on the cage instead). As you can see in the photo, I'm still attaching a bamboo stake to the tree to serve as a training guide once the scion starts to grow.

As I was grafting trees, I noticed a small unprotected pecan seedling that had been chomped by a passing deer (photo at left). Deer simply love the taste of emerging pecan shoots. This tree will recover and grow more leaves this summer but I will also need protect the tree with a deer cage to make sure this seedling grows strong enough to accept a graft in future years.