I've been making my way through the orchard, trimming grafts, removing stalked buds, and controlling weeds. This week I came across a prime example of a bark graft I made back in late April. The graft was pruned to one shoot growing from the scion back in June and I tied the new growth to a bamboo training stick (photo at right). The scion has grown nearly 5 feet in height. It looks impressive but this tree needs some care to keep the tree well balanced and to strengthen the central leader.
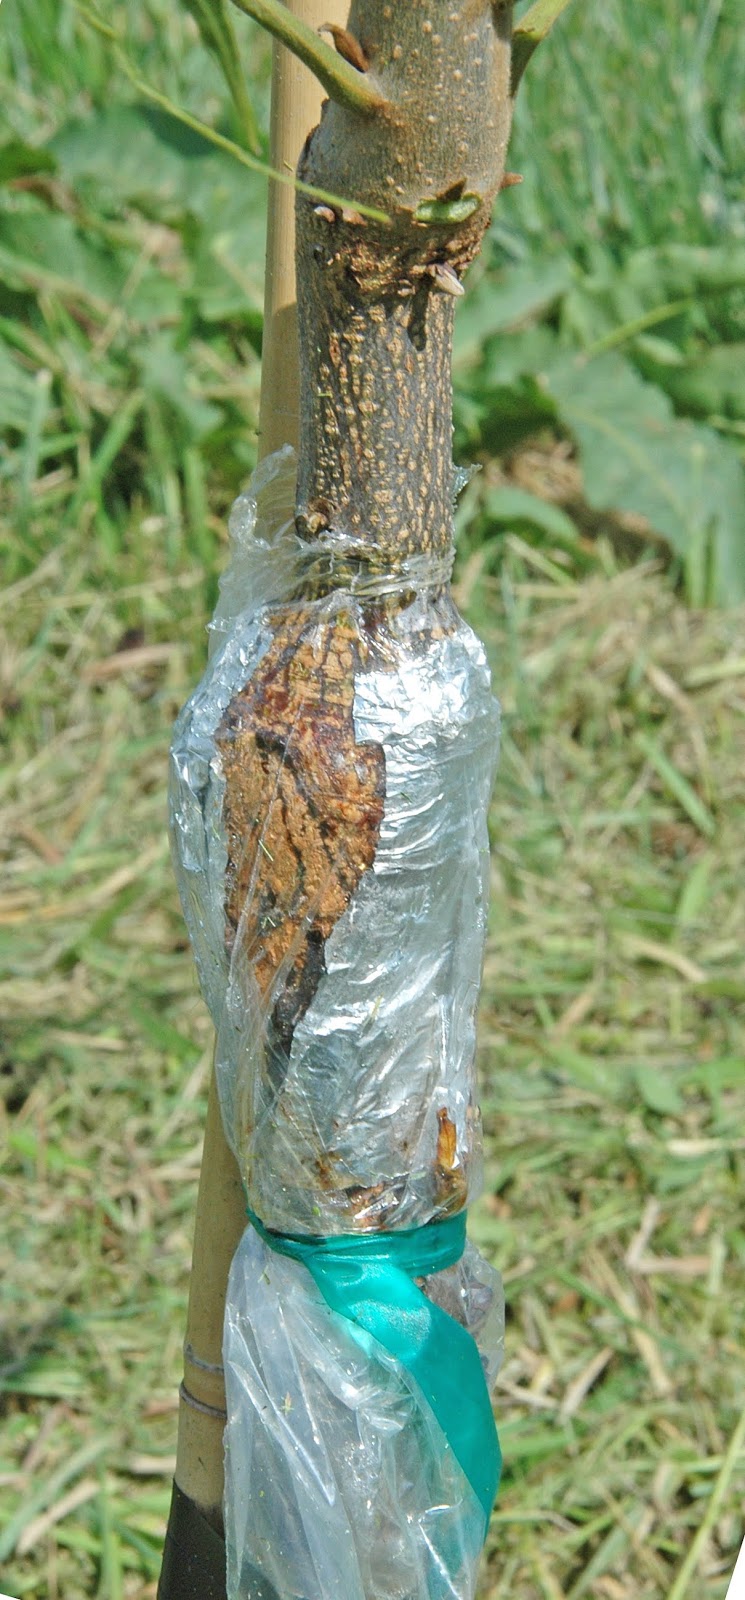
The graft union of this tree is growing so rapidly that the new growth has split open the aluminum foil I used to wrap the graft union (photo at left). During the month of August, I like to remove the plastic bag and aluminum foil then paint the graft union with white latex paint (to prevent sun scald). This tree appears to be more than ready to shed all graft wraps.
Once the grafts wraps are removed you can see how the tree is healing over the graft union (photo at right). Note that the area where the scion was inserted under the bark has expanded dramatically. In contrast, the trunk on the opposite side of the scion has remained roughly the same size as when the tree was grafted. It is clear from this photo that the tree is putting all its energy into growing the scion.
My first step in addressing the graft union is to cut away some of the dead tissue at the top of the stock. This tree was small enough in diameter that I could use my hand clippers to make a 45 degree cut (photo at left). Making this angled cut will help the tree heal over the wound on the stock must faster.
Once I cut the angle, I use white latex house paint to cover the graft union (photo at right). The paint protects the graft from sun burn and serves as a simple method to mark which trees in my grove have been successfully grafted. I use a paint brush to apply a good solid coat of paint to the area that was formerly covered by the grafting wraps.
Next, I moved my attention to the top of the tree. I noted that the tree had developed numerous stalked buds with one already growing as a small lateral branch (photo at left). To prevent the development of narrow branch angles these stalked buds need to come off.
I first attacked the largest stalked bud that had developed into a shoot. I needed my clippers to remove this shoot (photo at right).
Most of the stalked buds were still small and I could just tear them off the tree. The bud scar left after stalked-bud removal is seen inside the red circle in the photo at left.
As I mentioned earlier, this scion is growing at a rapid pace. In fact, the scion is growing much too tall for the diameter of the central leader. Tall skinny trees have a tendency to bend over under their own weight or snap off in a wind storm. To slow height growth and to promote diameter growth of the stem, I trimmed of the top 10 inches from the tree's central leader (photo at right).
To look at the tree after I was done trimming and training, it doesn't look much different than when I first approached the tree. Sure, you notice the white paint at the graft union but the top of the tree looks almost identical to the tree before I trimmed it. But that's the point, a few simple steps taken now will go a long way in developing a strong, trouble-free pecan tree. Ignore these training tips now and you will probably be faced with making major corrective pruning cuts later in the tree's life.