Saturday, April 9, 2011

Pecan trees breaking bud

     It is amazing what a couple of warm nights will do to advance bud development in pecan trees. The twigs, pictured at left, show the first stages of spring bud development. The upper bud on the far-left twig is in the bud swell stage. Here the normally narrow dormant bud has ballooned into a large plump bud. Moving down the same twig, you'll see a bud in the a stage we call outer scale split. The brownish scale covering the bud has split open revealing a silvery inner bud.
    As sunlight hits the silvery bud and it continues to expand in length, the bud will begin to green up (right hand twig in photo at left). On mature trees, you will note that the inner bud is actually made up of three buds--the two smaller buds surrounding a larger central bud. The buds on the outside will develop into catkins while the central bud will become a new shoot that will eventually terminate in a pistillate flower cluster.
    Vegetative shoots on young trees produce buds that contain only a single vegetative inner bud.
    The next stage in bud development is called inner scale split (photo at right). As green buds continues to enlarge, the inner scale splits open to reveal either catkins or a new shoot. At this point, the emerging plant structures are still compressed but you can easily recognize what they will become.
     As pecan buds continue to grow you be able to distinguish between protandrous and protogynous cultivars. Protandrous cultivars release pollen early in the pollination season and before their pistillate flowers become receptive. Protogynous cultivars shed their pollen late in the pollination season while producing receptive female flowers early, before they shed their pollen.
     In the photo below, the twig on the left has well defined catkins emerging while the vegetative buds have just begun leaf burst. This twig was cut from a Pawnee tree, a protandrous cultivar. The twig below and to the right was cut from the protogynous cultivar, Kanza. Notice that the two buds on either side of the enlarged, central vegetative bud are still relatively small. Kanza catkins will develop later, well after new leaves start emerging. Look closely at the Kanza vegetative bud (large bud at the top) and you will see that the inner scale has split.
     Following bud break is important for two reasons. First, the pecan tree grafting season begins when the buds enter the inner scale split stage. And second, control measures for pecan phylloxera are timed to specific bud development stages. Insecticide treatment for pecan stem phylloxera should be applied just before innner scale split. Pecan leaf phylloxera sprays should be timed at leaf burst (first leaf unfolds).

Wednesday, April 6, 2011

Promote a central leader

    I've been doing a lot of pruning around the farm, so it seems that every time I look at a tree, I pay close attention to the details of tree form. Some trees seem to have a perfect central leader form--strong straight trunk with well-angled lateral branches (photo at right). This young tree is about 14 feet in height (the pole pruner is 13 feet long) and has been producing a hand full of nuts each fall for the past 3 years.
    For the most part, I like to do most of my pecan tree pruning during the growing season. Summer pruning allows me to shape the way a tree grows much better than dormant pruning. However, during the late dormant period, I like to work on keeping a well focused central leader.
    Here's a close up photo (at left) of the top of the tree pictured above. Looks like I've got three branches competing for the role of central leader. It also appears that I have some pretty strong lateral branches that may try to compete with the central leader.   
    The first step in pruning this tree and to preserve its central leader is to remove two of the three upward growing branches.  Next, I'll remove all lateral limbs within 2 feet of the top of the central leader. Moving down the tree, I will head back some of the strong laterals to reduce competition with the central leader.

    With just a few pruning cuts with the pole loppers, I've redefined the central leader (photo at right).
    This may be the last time I'll be able to preform detailed pruning on this tree. By the end of this summer,  the top of this tree will be out of reach for pruning from the ground. However, because I've worked on building a strong central leader for at least 14 feet in height, I have a tree that should develop a strong, straight trunk that will easily bear the weight of future nut crops.


Tuesday, April 5, 2011

Bark graft maintenance

    Early spring is a good time to look over last year's bark grafts. In the photo at right, you can see that two grafts were applied to this tree last year but only one of the two took off and grew. We left the aluminum foil and plastic bag (applied at the time of grafting) on the tree to protect the graft union over the summer. You can also see a strong wooden stake attached to the tree used to support the graft and prevent wind breakage.
     First step is to remove all wrappings. When I removed the foil, the failed scion just fell off the tree (there was no callous formation to hold it in place). You can clearly see callous tissue formed at the top of the stock where the scion was inserted under the bark (photo at left).
    My second step in maintaining this graft is to trim the top of the stock. If you look carefully, you'll see a distinctive swelling in the stock's bark that runs at a diagonal from scion to the opposite side of the tree--about 1.5 inches down the trunk. To enhance the healing process, I'll  cut the corner off the stock just above that swelling.
    To find the exact angle and location to trim the stock, take your knife and peel back some of the bark on the side of the tree opposite the graft. You'll find that the tree has formed a natural barrier to wall off the wound you created in grafting. Above the barrier the bark will be dark and even decaying. Below the barrier the bark is alive and tan in color. In the photo at right, I'm using a hand saw to cut away the dead wood above the barrier. Note the tan, living bark below the cut. Also note that I'm cutting just above the diagonal swelling in the bark.
     By trimming the stock at the precise location the tree is trying to seal off the wound, you will enhance the healing process and reduce the time needed to keep the graft supported with a wooden stake.
  The final step in early spring maintenance is to prune the tree. Remove some of the lower limbs to force more of the tree's energy into the scion (note the fresh pruning wound below the graft union). Next, prune the scion so you'll have a nice central leader tree.

Friday, April 1, 2011

Target Canker on Pecan

    The tree, pictured at right, stands in a native pecan grove just  down the road from the Pecan Experiment Field. I've always marveled at the numerous cankers that cover this tree's trunk. So, with the sun finally popping out this afternoon,  I thought it a good time to take some photos.
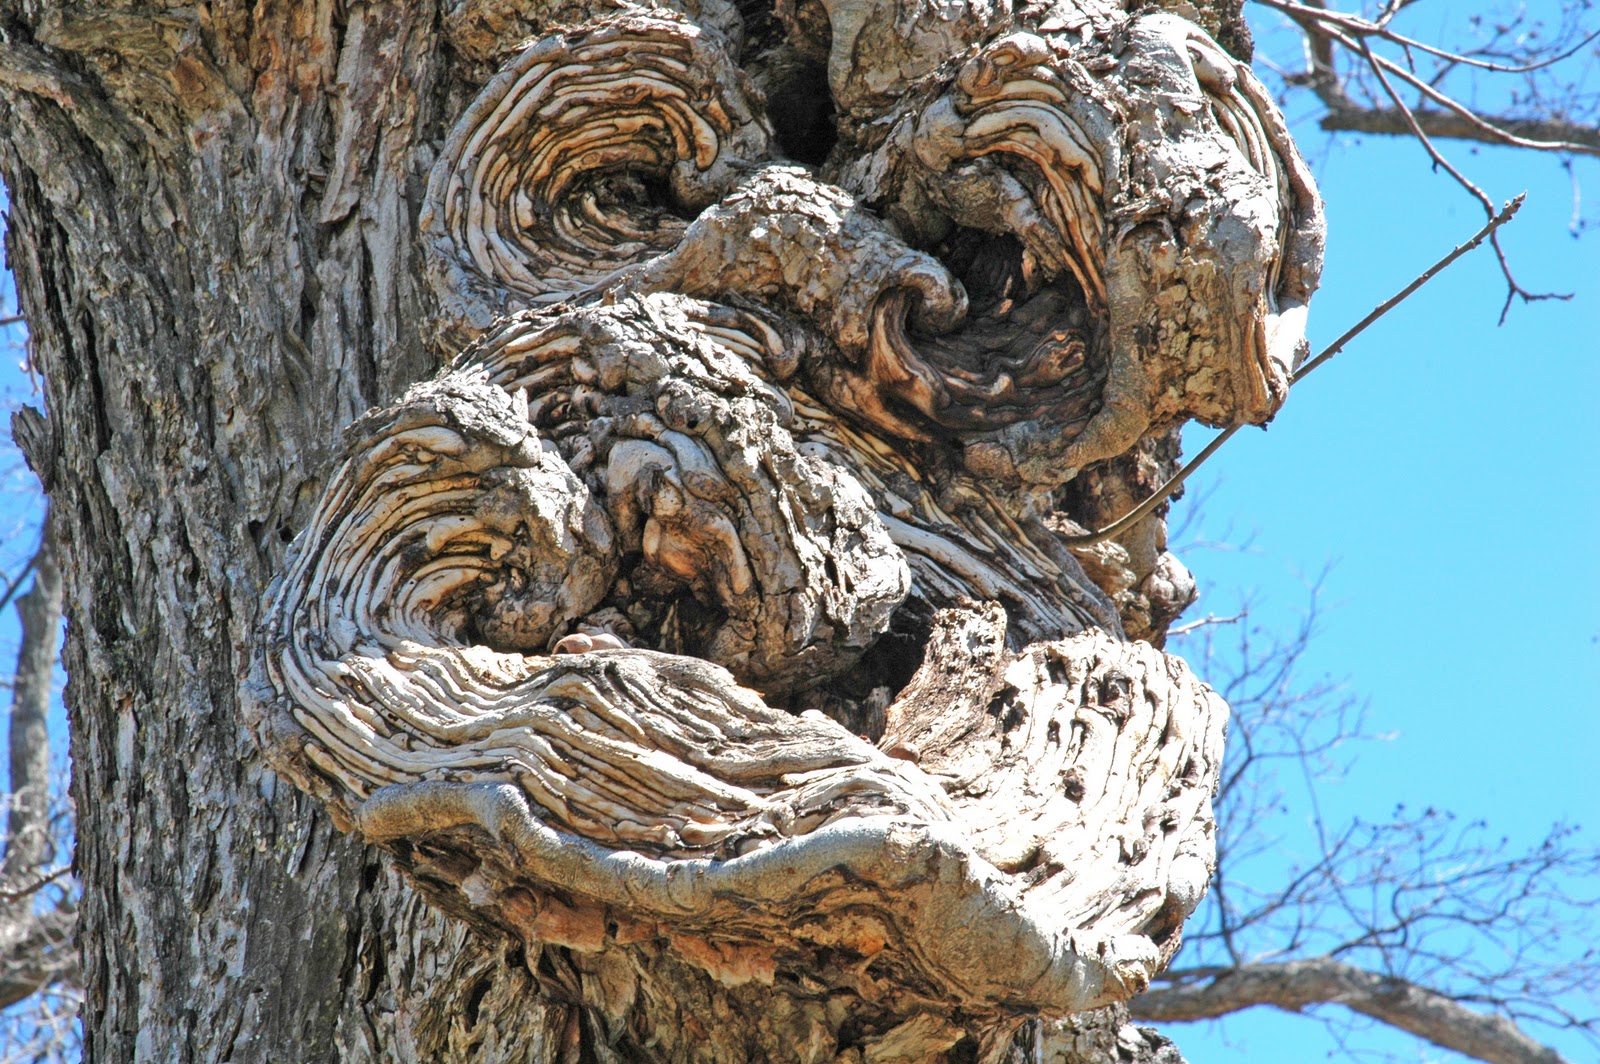
    The canker disease pictured here is commonly called target canker., The target-like concentric rings of callus tissue form as the tree responds to the attacking fungus. The disease is caused by the fungus, Nectria galligena, which seems to infect trees at the site of branch stubs. A large number of cankers weakens the health of a tree and can lead to poor growth and low nut yield. If this tree was in my native grove, it would have been cut down years ago.
  
    This tree must have read my mind about getting out the chainsaw.  I think it put on this monstrous face just  to frighten me away. (click photo at left to release the monster)