Sunday, March 31, 2019

Pecan buds starting to push

     My pecan trees have been slow to break bud this year, but finally, I noted the first signs of new growth. Pictured above is a Kanza shoot with the two primary buds nearest to the terminal in the bud stage called outer scale split.
   After checking my Kanza trees I took a quick survey of my other cultivars and found that some had split open their outer scales while others still appeared dormant. The photos below show bud development as of March 31, 2019.


    The start of budbreak is the signal to get started with fertilizing my pecan grove. However, we just had 3/4 of an inch of rain and I still have several puddles of water standing in the grove (photo at right). Its not a good idea to fertilize into standing water, so I will wait a couple of days for the water to seep into the ground before spreading my fertilizer.

Thursday, March 21, 2019

Pecan trees still dormant

     The calendar says its Spring and my peach trees are starting to show some pink buds. But it seems like its still winter in my pecan orchard.
    The first sign that pecan buds are beginning to expand is a bud stage that is termed outer scale split. I took the photo at right back in 2013 to illustrate what exactly outer scale split looks like. Note that the outer covering (or scale) that surrounds a dormant bud splits open when the bud inside starts to expand. Eventually the outer scale is pushed off the end of the bud to reveal a tight green bud underneath.
    I watch for outer scale split every year because this event coincides with the start of active tree root growth. Fertilizer is most efficiently taken up by actively growing tree roots so I make my Spring fertilizer application when I see outer scale split (I haven't fertilized yet).

   I checked three pecan cultivars for signs of bud growth; Faith, Hark, and Kanza. The photos above shown three twigs with fully dormant buds. From past experience, Faith will begin bud growth several days before Hark and Kanza. But as of today, Faith buds showed no signs of expansion.  Over the past few days we've experienced some mild daytime temperatures but our nights have still been chilly. It will take some warmer night time temperatures to wake up pecan trees from winter dormancy.     

Monday, March 18, 2019

Removing lower limbs

     One of the most common pruning mistakes pecan growers make involves removing lower limbs. It seems like folks get in a hurry to trim off all lower limbs with the idea they can force the tree to grow taller and faster. But pruning too severely can actually slow overall tree growth, enhance the development of stalked buds (which create narrow branch crotches) and cause sun scald damage to the trunk.
    While enjoying the sunshine and warm temperatures this past weekend, I spent some time pruning some of my pecan trees. The photo at right shows one of my Kanza trees. The tree has good form and requires no major corrective pruning. However, some of the lower limbs are just too low, making mowing around the tree with a tractor difficult. But when I prune lower limbs I take a "go-slow" approach. Lets take a closer look.
    The photo at left shows the lower portion of my Kanza tree's trunk. Four nicely attached limbs radiate from the central leader but they are all only 5 to 6 feet above ground level. All of these limbs will need be removed in time but not all this year.
    Last year I removed a single limb from this tree and the resulting wound has almost completely healed over (note wound just above the white marking paint). This year I'll prune another low limb.  Making the decision as to which limb to remove was not that difficult. I choose to remove the limb pointing to the left because it had another limb just above that would help fill its place in the tree's canopy.
    When removing a low limb I use my chainsaw to undercut the limb just outside the branch collar (photo at right).  Making this cut first will prevent possible bark tearing as I prune the limb off the tree.
     Next I use a plunge cut to remove the limb without damaging the trunk. I start the cut from the side of the branch leading with the lower half of the saw blade's tip (photo at left). Once the saw starts to feed into the branch, I complete the cut by pushing the blade through the branch and them downward. In making the plunge cut, I always try to align the blade at the same angle as the original undercut. This way I create a nice smooth wound.
   
     Once the cut is completed (photo at right), I don't treat the wound with any kind of tree would dressing. A healthy tree will heal over a wound of this size in just a couple of years. Just look how last year's wound has nearly closed over since last March.

     The above photos were taken before and after pruning. Note that the canopy of this Kanza tree has hardly changed. That's exactly why I take the "go slow" approach. By keeping the canopy of this tree largely intact I preserved both leaf area and nut bearing potential. After all, its the nuts I'm after. As this tree continues to grow in size, I'll keep removing low limbs at the rate of one per year until I achieve at least 8 feet of clear trunk. 
    

Monday, March 11, 2019

Still cutting pecan scionwood

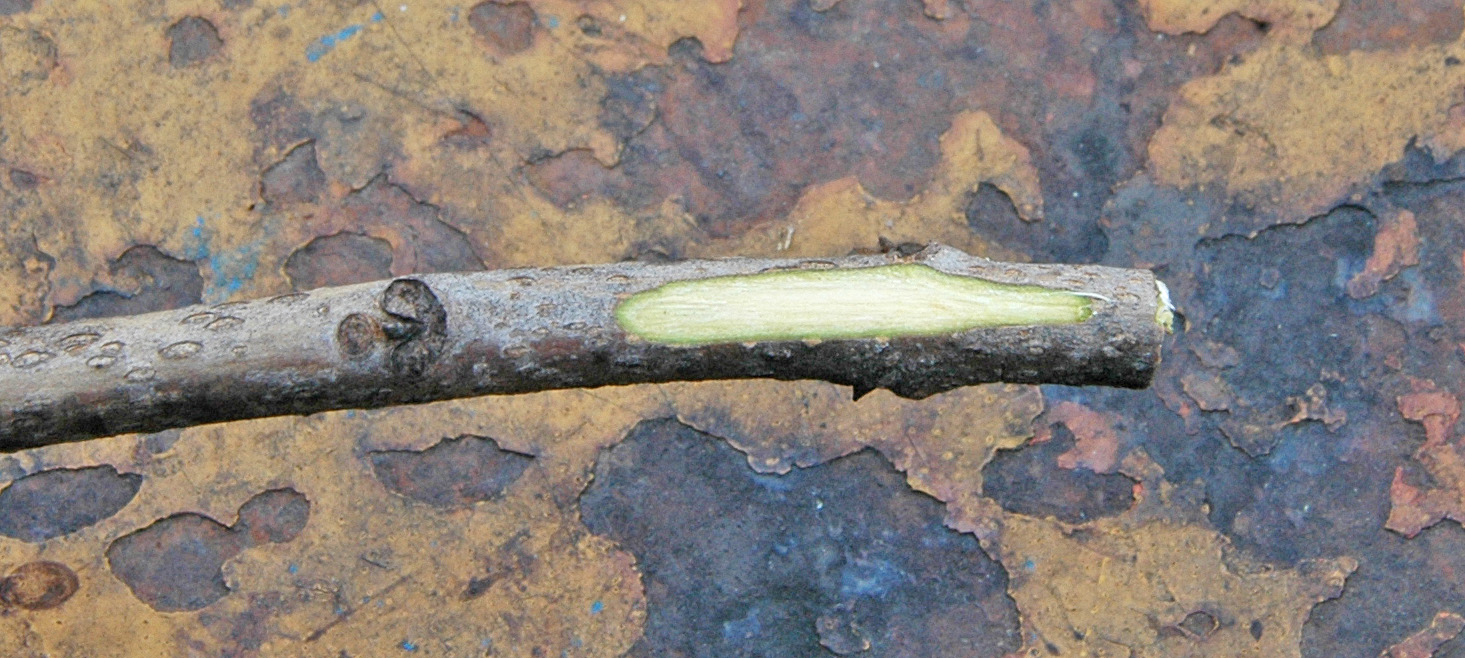
    The month of March sure came in like a lion. On the morning of March 4th, we recorded the coldest temperature for the 2018-2019 winter; 7 degrees F (-14 C). So when things warmed up a little this past weekend, I went out to the pecan grove to check on twig health. Since my trees have remained fully dormant all winter the cambium under the bark was still bright green (photo above). Since the trees are still dormant and the wood is still in good shape, I took advantage of some better weather to cut even more scions.
     I had already cut all the scions I could reach from the ground while pruning my young trees, but this past weekend I needed to get up high into some more mature trees to collect wood from some of the trees in my pecan breeding block. Collecting wood from mature trees is usually a challenge because shoot growth is usually short and buds are close together (close buds make carving a scion more difficult).

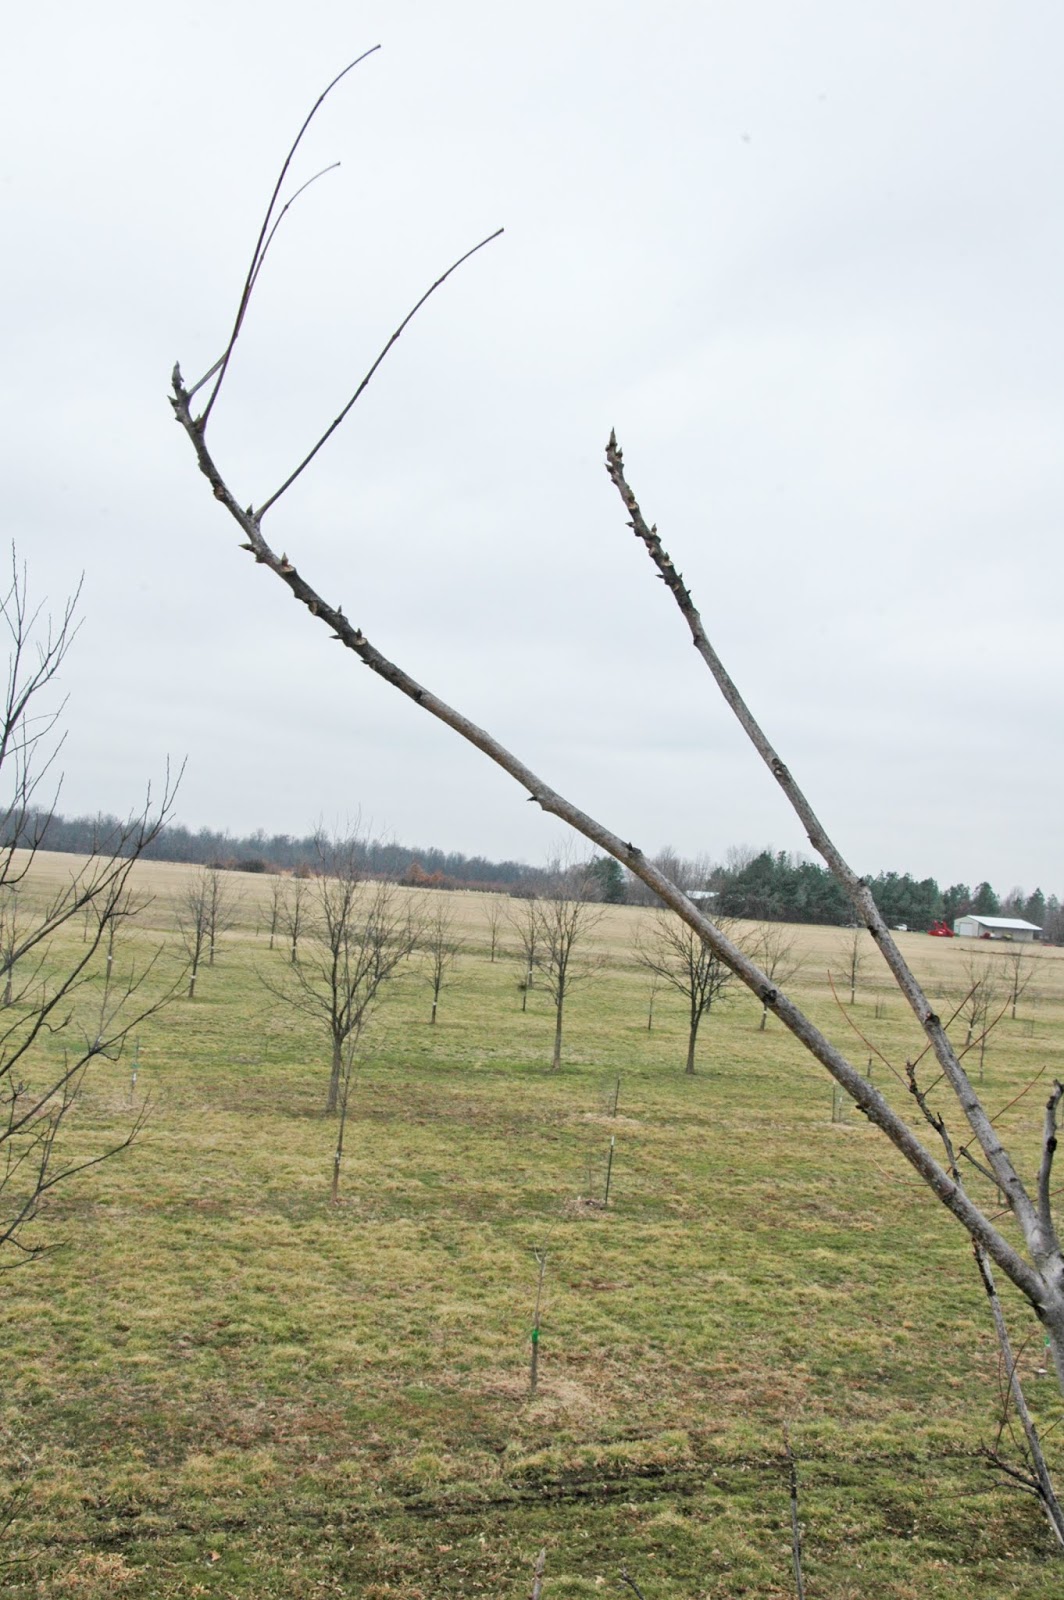
     Up in the tree, I spotted what looked like nice long shoots--perfect for scionwood (photo at left). This tree happens to be a cross between Major and Pawnee. Note that even in early March the shoot is still hanging on to a few rachii from last summer's leaves. This is a characteristic inherited from its Pawnee parent.
    On closer inspection, I noted that these long shoots were actually a combination of both 2-year-old and 1-year-old growth (photo at right). Note that only the 1-year-old portion of the stem has large prominent buds. In contrast, all of the primary buds on the 2-year-old wood have aborted from the stem.
      Because of healthy large buds, I usually collect only 1-year-old wood for scions but in this case, the short shoot growth found on this heavily bearing and mature pecan tree is just not well suited for grafting.

     To gain a scion I can easily graft, I cut a scion that is part 1-year-old wood and part 2-year-old wood. I start by cutting the shoot off the tree at a point about 3.5 inches below the beginning of the 1-year-old wood. (photo at left). The presence of healthy buds on the lower portion of the scion is not important to graft success. This is the part of the scionwood stick that will receive all my cuts during the grafting process. For me, its important to harvest a scion that is at least 3/8 inch in diameter and contain more wood than pith inside the stick.  I've found that thin, pithy scions have a high failure rate.
    To complete this scion, I remove the upper portion of the 1-year-old wood. Note that I'll still have some nice plump buds to provide growing points for the graft.  In the end, I only harvested a single scion from each shoot. The scions are about 7 inches long in total and are exactly one half 2-year-old wood and one half 1-year-old wood.
    Although I much prefer collecting scions from young vigorously growing trees, some times you have to just make things work.