Saturday, August 31, 2019

Making my last weevil spray

    It has been a difficult year to make decisions on timing insecticide treatments to fight pecan weevil. During the month of August we received 9.9 inches of rain, with rain falling 16 out of the 31 days in the month. However, I did manage to get the grove sprayed 3 times in August with my last spray applied August 31. 
   With plentiful rainfall this month, all the farm ponds in the area are full. That a good thing because, I use pond water to fill my sprayer tank (photo at right).  However, the excessive rainfall also meant that every time I sprayed for weevil this year,  I had pull my spray-rig over water saturated soil. I'm now very glad I spent the extra money to buy a 4-wheel drive tractor.

Tuesday, August 27, 2019

Caught in the act of filling kernel

   I cut open a Kanza pecan today to check on the kernel filling process (photo above). What I found was a layer of white kernel tissue just inside the seed coat, then a layer of translucent gel-like material just inside the white layer. What I actually captured on film was the kernel filling process.
   The process of kernel deposition starts on the inner surface of the seed coat and then works inwards toward the center of each kernel half. New kernel tissue starts off in a gel-like form. Then, as addition carbohydrates flow into the kernel, that gel become more solid and white. As the season progresses,  kernel tissue will be packed so tightly inside the shell that the kernel will actually compact the center wall partition and all the packing material found on the inside of the shell.
    Some folks just eat pecan kernels and never consider how those golden kernels were made. However,  I find watching the process of kernel filling fascinating. 

Tuesday, August 20, 2019

Spraying for pecan weevil

   I was up at 4:30 am this morning to spray my pecan orchard before the sun came up and it got too hot to achieve good spray coverage. My aim was to make sure pecan weevils weren't able to lay eggs in any of the pecans.  Pecan weevils (pictured above right) are "snout" beetles that can puncture the shuck and shell of a pecan to lay eggs inside the nut. The result are legless worms that devour the entire nut kernel.

    A key behavior of pecan weevil females is that will not start laying eggs until the nuts enter what is commonly known as the gel stage. The photo at left shows a 'Gardner' pecan that I cut open this morning. The kernel cavity is still largely filled with liquid endosperm but, just inside the kernel seed coat, a gelatinous layer of pecan kernel has begun to form. This translucent tissue is what we call the gel stage.
    With the soil moisture at near capacity, I  knew weevils had already begun to emerge and  would be ready to start laying eggs. Today promised to be sunny but very hot, so getting an early start on spraying was critical. I like to finish spraying for the day before the temperatures rise above 85 degrees F.
    When I first started spraying it was still dark. With all the tractor lights on, I could see just enough to navigate down the rows of my pecan breeding plot. However, spraying in the early morning hours has its advantages. The humidity is highest at this time of day which allows the mist created by the sprayer to travel further though the air. Before long, the first hints of dawn allowed me keep spraying without fear of getting lost in a maze of tree trunks.
   In 10 to 14 days, I'll need to spray again for late emerging weevils.
    

Friday, August 16, 2019

Summer time training young pecan trees


    Usually things dry out in Kansas come August, but not this year.  This summer has been warm, humid, and wet. And pecan trees seem to love it. All my young trees have made impressive new growth.  However, I've spotted some potential problems with the form of my trees especially at the very top of the central leader. The photo at right shows a typical young tree in my orchard.
    From this distance the tree looks in good shape. A strong central leader with some wide-angle lateral limbs near the base. But I took a closer look at the very top of the leader.
    At the very top, I found 2 shoots that have sprouted and look to to be competing for the role of central leader (photo at left).  I definitely don't  want to leave both of these shoots in place because in just a couple of years I'll be dealing with a narrow, forked tree.
   In removing one of the shoots, I choose to make the cut easiest to complete (photo above). With a single snip of the clippers, I've regained a single central leader.

     The photo at right shows another one of my trees. Again, things look pretty good but the very top of the tree is starting to look a little bushy.
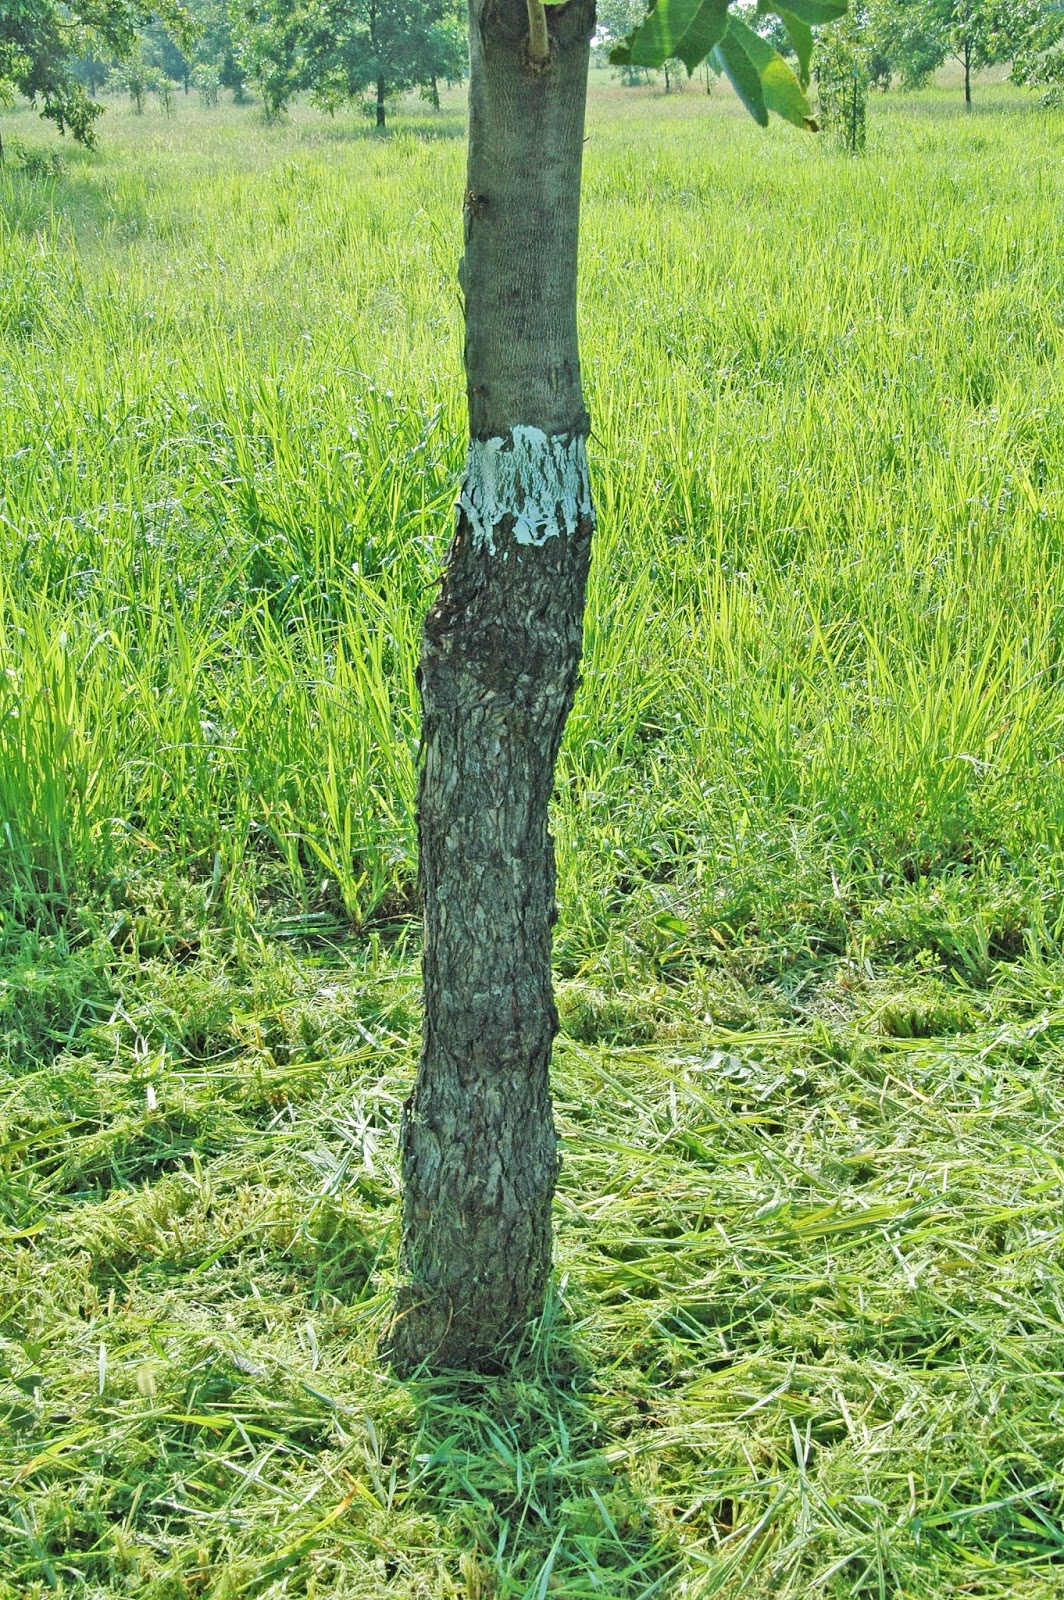
    This time, lets start by looking at the lower portion of the tree's canopy (photo at left). First note that all the lateral limbs have nice wide angle crotches. Following the 2-foot rule, I tip pruned all these one-year-old side branches when they reached 2 feet in length. Note the location of the slight crook in the central leader. This is where the leader started new growth back in May. And like I've previously mentioned, my trees are growing like mad. This year's new growth on the leader has already topped five feet in length.
    Taking a closer look at one of the lateral branches, you can see why removing stalked buds is such a good idea (photo at right). Last year I cut out a shoot that had developed from a stalked bud. The stump of that shoot is still on the trunk but a  new lateral shoot has developed from a secondary bud to created a nice wide angled branch.
    Now lets focus on the very top of the central leader.
Several shoots have developed and the tree is starting to loose its strong central leader. It is interesting to note these are the first lateral limbs this tree has developed on the central leader arising from the current season's new growth. However, if I want the tree to develop lateral branches further down the stem, pruning to maintain a central leader is critical.  All that new growth on top of the tree actually inhibits bud growth further down the stem.
    Using a ladder and my clippers I pruned the top of the tree back to a central leader (photo at left).
    The photo above shows before and after pruning. The photos look almost alike except for the very top of the tree.  With just a couple of snips, I have regained an obvious single leader.

Saturday, August 10, 2019

A tree straightens out over time

    Back in 2015, I showed how I re-grafted a tree a tree whose original graft was killed by mid-winter cold. I ended up removing the dead wood and making a new graft on a trunk sprout that emerged below the original graft. When I was done grafting the tree looked like a crooked mess (photo at right).
   The new graft took and has grown vigorously for the past 4 years. The question is:  Will this tree always have a crooked trunk?
    The photo at left shows the trunk of my re-grafted tree as it appears today.  The white paint on the trunk indicates the location of the graft union and the fact this tree is a Kanza tree. You can still see a slight wobble in the tree trunk but for the most part this tree has straightened out over time.  Over the past 4 years, this tree has grown wider tree rings on one side of the tree to allow the tree to better balance the weight of the tree's branches. The result is a nearly straight trunk able to easily support the growing canopy of this young tree.
 
    A closer look at the trunk reveals that you can still see the remnants of the pruning cut I made to remove the original dead graft. Below the graft union (white paint) a knot in the trunk indicates the location of the completely healed over tree wound (photo at right). 
   In a few more years, all evidence of my crooked graft will completely disappear as this tree will become just another Kanza tree in my orchard.

Friday, August 9, 2019

Early August pest control

    Every August, I spray my pecan grove during the first week of August to reduce stink bug populations. I know stink bugs are active in the grove when I start seeing dropped nuts on the orchard floor. If you look over the outside of a dropped nut, you'll have a hard time finding any puncture marks. However, cut open the dropped nut and you'll find that the inside of the nut has turned dark brown or black (photo at right).
    The unusually wet summer we've had this year has made pecan pest control even trickier. Heavy rainfall starting on the first day of August and again a week later has saturated the soil allowing pecan weevils to start emerging. Under moist soil conditions throughout the month of August, weevils will not flush out all at one time. Instead they will emerge slowly over the entire month. So this year, my early August stink bug spray is also aimed at controlling any early emerging weevils.
    The hot, humid weather we've had all summer long has also made conditions perfect for the spread of pecan diseases. Although pecan scab is our primary disease problem, wet conditions late into the summer means that pecan anthracnose and downy spot will also become problematic. To keep all these diseases in check this summer, I made my forth fungicide application with my early August spray.
    Determining the best day to spray was also a problem. It didn't look like I could afford to let things dry out completely so I just had to pick a day with the lowest rain chances and pray I would get at least 8 hours of drying time to allow the pesticides to do their job. I like to start spraying at first light. The winds are calm and the high relative humidity allows the spray to drift up through the entire tree canopy allowing me to get excellent spray coverage.
   In two weeks, I'll be spraying the grove again. This time with an insecticide specifically aimed at pecan weevil. 

Monday, August 5, 2019

Summer shaking to reduce over-cropping


    Many of the Kanza trees in my orchard have set far too many nuts. Nuts can be seen on almost every terminal with way too many nuts per cluster (photo at right). At first, I thought my young trees could handle the heavy load but after already seeing some limb breakage, I decided that 2019 was a good year to practice nut thinning.
    Fruit thinning is standard practice for many fruit crops. In my fruit orchards, we remove a portion of our apple, pear and peach crops every year to ensure that the remaining fruit are top quality and the trees are able to bloom next year. The same holds true for pecan. Too many nuts on a tree will result in poor quality kernels during the current season and a much reduced flower crop the following season. To regulate a pecan tree's crop load, I use my trunk shaker to remove a portion of the crop.

    Today my Kanza nuts were in the water stage with limbs hanging low under the weight of  the crop (photo at left). Capturing a heavy crop in mid-summer on film is a little difficult. The green shucks of the nut clusters blend in with the green foliage. However, if you look closely, you'll note almost every shoot is terminated by a cluster of pecans.
    Over the years, we have learned that shaking pecan trees when nuts are in the water stage can reduce the negative effects of over-cropping.  In my orchard, I use a Savage 3-pt hitch trunk shaker equipped with doughnut pads (photo at right). In shaking trees for crop load regulation, I've learned that every cultivar shakes a little different and you need to develop just the right touch to get enough nuts removed. Normally I shake in short bursts; evaluating what is left on the tree after each shake. After a while, I get a feel for how the trees are shaking this year and I can start moving through the orchard at a more rapid pace. 
    For the most part, folks usually don't shake enough off on their first go-round with summer nut thinning. However, as you get used to the technique, you will begin to focus on what is left in the tree rather than what falls to the ground. 


Heavy pecan crop exposes weak tree structure

    After a weekend of thunderstorms and heavy rain, I drove down into my pecan grove to check on my trees. This year my trees are so weighed down with nuts that high winds can cause serious limb breakage. It didn't take too long before I spotted the tree pictured at right. At first glance, it looked like the central leader of this tree just snapped.

   On closer inspection, I learned that the tree actually split at a narrow branch crotch that had a well defined bark inclusion (photo at left). Once the two branches of the narrow crotch started to split the entire trunk split just like a piece of firewood.
    I cut off the fallen portion of the tree and was able to get a close up view if the bark inclusion (photo at right). Notice that above the inclusion the bark of this fallen branch has a long rub mark (brown patch on the grey bark). The two limbs that made up this narrow crotch had been rubbing against each other every time the wind blew and forcing open the bark inclusion. It was only a matter of time before one or both would give way.
    I left the remaining damaged but upright branch in place. This weakened branch may break in the next storm but for now I'll leave it in place to see if it can heal over such a large wound.
    I pulled off a nut from the fallen limb and cut it open (photo at left). This Kanza nut was in full water stage; the perfect time to shake a tree to reduce a heavy crop load. This broken limb made me go back and look at all my Kanza trees more closely.  After careful consideration, I decided to get my trunk shaker ready. (see summer shaking post)