Friday, November 27, 2020

Fall tree planting

     Now that my 2020 pecan crop is harvested, I have been able to spend a little time planting the seedling pecan trees I grew in containers over the summer. I actually prefer to plant container-grown trees in the fall because it gives the young trees a chance to start developing new roots into the surrounding soil before the  arrival of deep-cold, winter temperatures.

     One-year-old pecan seedlings are generally not very impressive (photo at right). The seedling's priority is to grow a strong tap root to ensure its survival as a young trees during challenging weather conditions. During the early years of tree establishment, top growth is suppressed in favor massive root growth. Only after the tree has created a large, healthy root system, will top growth take off. 

    When I plant a seedling pecan tree, I shake off any loose potting soil before placing the tree in a freshly dug hole. The hole is dug just deep enough to contain the rootsystem. Using my hands, I crumble the soil back into the hole, covering the root system and making sure to avoid creating any large air pockets near the roots. Once I've refilled the planting hole, I firm the soil around the seedling tree with my hands (photo at left).  


    Once planted in the field, a small pecan seedling is easy to overlook but not so for deer. Years ago, I had several seedling trees pulled out of the ground and chomped by a passing deer. It seems they like the taste of well fertilized seedling pecan trees. So before I leave the planting site I always cage each tree. 

    The first step is to drive a steel fence post into the ground about 12 to 14 inches from the seedling (photo at right). Note that the paddle on the fence post is still showing above the ground. I do this intentionally to prevent tree roots from growing over the paddle and making fence post removal difficult. 


   Once the fence post has been driven, I place a welded wire cage around the seedling (photo at left). At this point, such a large cage seems like overkill but the cage will remain in place for many years or until the tree has been grafted and grown above the height of the cage.

   In the short term, the tree cage makes finding young seedling trees planted out in a large field much easier. The cage not only helps me locate each tree but gives me a good idea of how large a weed-free area I need to maintain to stimulate tree growth.

Sunday, November 22, 2020

A good week for second harvest


    This past week we had another stretch of dry weather so I took the opportunity to go back into the orchard to scrap pick any pecans I missed a couple of weeks ago.  When I shook the trees back in early November, not all the nuts fell from the trees. But this past week, all the shucks were fully open (photo above) so a quick shake brought any remaining nuts to the ground.  

       Running the harvester over the orchard a second time might seem like a waste of time, especially if you take a quick look at what's inside the hopper. A second pass over the orchard floor seems to bring in far more sticks, stick-tights, and other trash. But over the years I've always found that a second harvest can increase my total harvest from 15% to 30%. During short crop years, like this year,  I expected my second harvest to be understandably small. After cleaning second harvest nuts I came up with 15% more crop for 2020.


   The amount of trash harvested during a second harvest can be over-whelming especially since I'm a one man operation. I help make my job easier by dumping the harvester's hopper directly into a pre-cleaner. In photo above, the hopper of the harvester is lifted into the dump position. For those of you familiar with a Savage pre-cleaner, you'll note I've added two side boards to the pre-cleaner's hopper. These extensions help prevent the spilling of nuts if my aim with the harvester is off a little bit. Once the door opens on the hopper to dump nuts, pecans fall out quickly.

    A Savage pre-cleaner uses a strong fan to blow leaves, shucks, sticks and light pecans out of the crop. Once the nuts pass over the fan, an elevator lifts to nuts up to be dumped into a truck, grain cart, or in my case, a super-sack. Once the semi-clean nuts are in a super-sack, I can store them in my barn until I have time to fully clean and inspect them using my cleaner.    

Sunday, November 8, 2020

A good week for pecan harvest

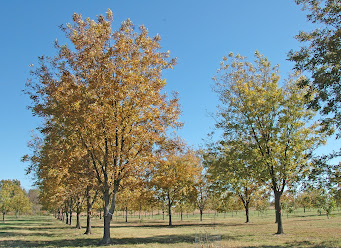
     Its not often that we see the golden yellow of pecan fall color but this year all the trees in my grove put on a beautiful display (photo at right). All week the weather was clear, dry, and warm--perfect weather to start harvesting pecans.


   On my farm, pecan harvest is a one man operation that involves my use of several types of pecan harvesting equipment. The first step in the process is to use a three-point-hitch mounted trunk shaker to dislodge to nuts from the tree (photo at left). To me, tree shaking is the most exciting part of pecan harvest. The sound of nuts raining down on the metal canopy of my tractor gives me an immediate idea of  how well each tree has produced this year.

    Once the nuts are on the ground, I jump into different tractor that has a pecan harvester attached (photo at right). Sweeping nuts up off the ground with the harvester is a slow but steady process. I always start harvesting just outside the drip line of the tree then work my way inwards towards the trunk. My Savage harvester picks up nuts in a 5 foot swath so, on larger trees, it takes multiple passes to cover the ground. I've learned to be especially careful when maneuvering the picker near tree trunks. The front outside corner of the harvester can leave an ugly scar if you get too close. 

     Once the pecan harvester's hopper is full, I drive towards my barn to dump the hopper into a pre-cleaner. The pecan harvester picks up more than just pecans. When I dumped the hopper this year, I saw a mixture of nuts, stick-tights, shucks, sticks, and even acorns. Thankfully, I didn't pick up any mud balls this fall--soil conditions were ideal for harvest this fall. The pre-cleaner does a good job of removing sticks, shucks and leaves from the nuts. Next, I run the crop through a cleaner inside my pecan barn. The cleaner is good at removing poorly filled pecans and any nuts that were thinned off during mid-summer crop load adjustments. The final step in the cleaning process is to visually inspect every pecan as they move down an inspection belt.  This year, acorns and green hulled nuts are the most common items thrown off the inspection table.

   Back last spring, the 2020 crop year looked to be an outstanding year for Kanza. I had full crop of Kanza nuts and was excited to be able to reap the rewards of years of tree care. But like everything else this year, the unexpected can ruin the best laid plans. The summer of 2020 was extremely dry in our area. Corn fields withered and pecan trees suffered. The photo at left exemplifies what a lack of summer rainfall can do to a Kanza crop. 

     Under drought conditions, Kanza nuts were almost 2/3 their normal size, while some nuts were even smaller. During harvest, I picked up numerous Kanza nuts still held inside green shucks. I cut open several green nuts (photo above) to reveal a total lack of normal kernel development. It is obvious to me--no water, no kernel development.


Saturday, October 17, 2020

Fertilizing pecan trees in the Fall


      Long time readers of this blog will remember that I like to make two applications of fertilizer to my pecan trees each year. The first is applied in early spring when buds first show signs of swelling. The second application is made in the Fall, usually in early October. This year I delayed the Fall application until today based on soil conditions and weather predictions (photo at right). I applied a complete fertilizer containing N, P and K.

    During the first half of October, the weather has been unseasonably warm and the soil bone dry. Spreading nitrogen fertilizer under these conditions would result in massive losses of nitrogen from volatilization. So I've been waiting and closely watching the weather forecast. Today, the wind blew hard all day with the approach of a cold front that promises to drop our temperatures and give us a good chance of rain. If we get about a quarter inch of rain tomorrow, all the fertilizer I spread today should get washed in.


    One frequent question I receive concerns the fertilization of young trees. Many folks like to hand fertilizer young trees by spreading fertilizer in a circle around the tree. The thought is to fertilize just the tree and not all the ground cover between trees. On my farm, I broadcast fertilizer over the entire pecan planting (photo above) regardless of tree size. Sure, broadcasting fertilizer will stimulate the ground cover but I view that as beneficial. Every time I mow the pecan grove, I'm adding valuable organic matter to the soil. Soil organic matter increases water retention and increases the availability of essential micro-nutrients. In addition, the rotting grass clippings release significant amounts of N, P and K back into the soil (nutrient recycling). Over the long term, my objective is to develop a healthy soil environment  which promotes active pecan root growth. With healthy roots, I'll maximize the productivity of my pecan trees.

Sunday, October 11, 2020

Dry summer changes pecan appearance

     The summer of 2020 was hot and dry in S.E. Kansas. In fact, it was so dry that normal nut development was inhibited. This past week, I was collecting nut samples when I decided to see how much nut size and shape was effected by comparing nuts harvested this year with nut samples I have saved from the high rainfall year of 2019. Since most of the nut samples I've been collecting are from my breeding project, several examples pictured below are numbered selections. However, I collected Kanza nuts to illustrate the impact of dry weather on a known cultivar. You should note that all of the nuts collected in 2020 have darker shells that 2019. That is because the 2020 samples were just pulled out of the husk (at shuck-split) and are still quite wet.   


    The Kanza pecans from 2020 are visibly smaller that 2019. In addition, the 2020 nuts are shorter and more rounded. The good news for Kanza this year is that we received just enough rain in late August/early September to completely fill out the kernels inside the shell.
 

     Dry weather had minimal impact on the overall size of KT114. However, nut shape was effected. The 2020 nuts are not as blocky as the 2019 nuts. You can see the difference by looking at the base and apex of the nuts.


    KT217 nuts collected in 2020 illustrate two common changes in nut appearance associated dry weather. First, overall nut size is smaller. But secondly, the 2020 nuts are more tapered toward the base. Remember, all nut development processes start at the apex and work down toward the base. In the case of KT217, water became increasingly limited during nut enlargement resulting in a nut that has a much smaller diameter base.

 
    KT252 nuts are much smaller in 2020. The nuts are less blocky and ever show some basal taper. The overall changes in nut shape in 2020 make it hard to believe that nuts from 2019 and 2020 came from the exact same tree.

   Since irrigation is not an option for my pecan grove, yearly fluctuations in nut size and shape are to be expected. Each year, I collect nut samples from each cultivar and breeding selection in my orchard. Part of the data I collect from these samples is a photographic record of nut appearance.  As the years progress, I'll be able to see exactly how each clone reacts to variable weather conditions.  


Wednesday, September 30, 2020

A quick check of pecan kernel quality


     During the past couple of weeks, I've been recording the date of shuck-split for several pecan cultivars and the trees in my pecan breeding plot (photo at right is KT149). On the day I find a cultivar at shuck-split, I collect a sample of 30 pecans to be weighed, measured and shelled once the nuts are fully dry.

    While collecting these nut samples, I always choose one nut to take a quick look at kernel quality. Using a pair of pruning shears, I carefully cut a nut in half then inspect how well the kernel has filled the inside of the shell.


    The photo above shows 5 different selections from my breeding program all collected on the same day. After a very dry summer, I expected to see more poorly filled nuts. However, nut quality ranges from passable to fully packed. 

    The first thing I notice when looking at a nut in cross section is the width of the interior partition between kernel halves. Note that the nut on the far left has a extremely wide partition and you can see air pockets between the kernel and the outer shell as well as the interior partition. Nuts from this tree will produce kernels that are brittle and dry tasting.

    A fully filled pecan (far right nut) packs kernel tissues so tightly inside the shell that it compresses the interior partition into a fine line. You should also note that the kernel is totally solid with no air spaces. The kernels produced by this tree will be dense, richly-flavored and oily.


    A nut cross section can also reveal how well packing material is released from the dorsal grooves of a kernel half during the shelling process. In the photo above, I give 3 examples. On the upper surface of each kernel half, you will note the cinnamon-colored packing material that dips down into the dorsal grooves of the kernel. Narrow dorsal grooves can trap the packing material during shelling often requiring manual removal. The flared dorsal groove can also trap packing material especially if the overall shape of the groove is narrow. In making selections for release as new cultivars, I always prefer kernels with wide dorsal grooves. When shelled, these kernels will be completely clean.   

Monday, September 21, 2020

Bark graft snaps in the wind


    One of the bark grafts I made this past Spring died suddenly (photo at right). The graft was still standing up straight and tall but all the leaves had turned brown. This warranted closer inspection.


    I immediately focused in on the graft union (photo at left).  Even though I had painted the graft union white, I could see that the scion had been broken right at the very top of the stock. I carefully stake every bark graft but is obvious that I did not secure the stake tight enough to the tree to prevent the scion from rocking back and forth in strong winds. I had used black tape to secure the stake to the tree but upon inspection I found that I could wiggle the stake just enough to allow the breakage observed to the scion. In the future, I'll need to start bringing a cordless impact driver and wood screws to the field when installing stakes on bark grafts. Two screws placed through the stake and into the stock tree should help hold things rigid. 


     The breakage of this one graft encouraged me to start looking at other bark grafts I made this year. I was especially interested to see how each scion grew at the very top of the stock. The photo at right is typical. This scion appears to be trying to creep over the top of the stock. You can also see how  new tissue is forming up from the cambial layer of the stock to grab onto the side of the scion. At this point, the scion can still break easily unless it is help firmly in place with a strong stake and plenty ties.


     I noted that bark grafts applied to 1 to 1.5 inch diameter stock trees can close over the grafting wound very quickly. The tree pictured at left was grafted this year and has nearly grown completely over the stock wound. 

    I've been grafting pecan trees for 40 years now. Every year presents a new set of challenges to overcome and lessons to learn. It is a good thing I've got plenty of young seedling trees coming along to teach me even more lessons about pecan grafting in the future.


Tuesday, September 15, 2020

Waiting for pecan shuck-split


     One of the cultivar traits important to northern pecan growers is ripening date. I judge pecan ripening date by recording when at least 50% of the nuts on a tree have split shucks. 

    I always start scouting my orchard starting in mid-September and pay particular attention to the trees in my pecan breeding plot. One tree, a cross of Pawnee and Greenriver, is always the first to shuck split. Over the previous 4 years, the tree I've labeled 'KT337' has ripened on 19 Sept 2016, 20 Sept 2017, 17 Sept 2018, and 13 Sept 2019.  This year, I first checked this tree yesterday (14 Sept 2020) and found some nuts shuck-split (photo above) but the tree had not yet achieved the 50% shuck-split level.


    I pulled several nuts off the KT337 tree to show you the variation in ripening you can find on a single tree (photo above).  The nut on the far right was pulled from fully split shucks, while the nut next in line was loose in the shuck but I had to forcibly peel back the shucks. You will note that the shell of nut #2 is still partially white, indicating that the nut was not yet fully mature. Nuts #3 and #4 illustrate how the shuck splitting process proceeds. The first sign that pecan ripening has begun is when the shuck starts to pull away from the shell near the tip of the nut. In time, shuck separation moves downwards towards the base of the nut. As the shuck separates, the shell starts to develop cinnamon-colored markings on its white shell surface. These markings will turn jet black and the shell a rich brown when the nut is fully mature.   

Update: 18 Sept 2020


     By Friday, September 18th, KT337 had reached over 50% shuck-split (photo above). This selection remains the earliest ripening pecan in my pecan breeding block.


Thursday, September 3, 2020

Spraying to control pecan weevil


      It has been hot and dry most of the summer in extreme SE Kansas. The lack of rainfall has effected nut size (smaller nuts than normal) and has delayed the emergence of pecan weevil.

    During most years pecan weevil adults emerge from the soil starting in early August (male and female weevils pictured above). However, during periods of drought, soil hardness prevents adult weevils from tunneling out of their subterranean pupal cases.

   We finally received 3/4 inch of rain last Saturday which should have been just enough moisture to soften the ground and allow weevil emergence. I was all ready to start up the sprayer on Sunday, but then I looked at the weather forecast. More significant showers were predicted for my area on Monday, Tuesday, and Wednesday. To avoid wasting insecticide by spraying one day and getting it washed off the next, I decided to wait until the danger of heavy rain was past. 

    Turns out, we never did get any heavy rainfall earlier this week, just plenty of cloud cover and fog. So I decided to make an application of Sevin insecticide today.  My orchard does not have a history of heavy weevil infestation but I have a neighbor that has un-managed native trees. When and if I get weevil damage, it is usually a result of weevils migrating into my grove from the adjacent property. Hopefully, today's spraying will keep visiting weevils from getting established in my grove.


Thursday, August 13, 2020

Squirrels feeding on young tree bark

      When nut growers think about squirrel damage, they usually imagine their crop eaten by the fuzzy-tailed bandits. However, the other day I spotted a different kind of squirrel damage that can be equally as damaging, especially to young trees. When their normal food supply runs low, Squirrels will strip the bark from smooth-barked pecan trunks and/or limbs to feed on the tree's nutrient rich cambial layer (photo at left).

    Squirrel bark stripping is an especially troublesome problem on young grafted trees. If the bark is removed around the entire diameter of the tree, the upper portion of the tree will eventually die. Hopefully a bud above the graft union but below the girdled area will break next spring and grow into a new trunk.

    After seeing squirrel damage on several young trees, I decided it was time I did my part to help feed the squirrels.  I set out some conibear traps baited with one of last season's pecans (photo at right). Directions for trapping squirrels can be found HERE

    It turns out my local squirrel population was still hungry and couldn't resist a nice large pecan. That's one down and dozens more to go.

Tuesday, August 11, 2020

Time for nut crop thinning

     This year, my Kanza trees have set way too many nuts to be able to produce high quality kernels come this Fall. To remedy this problem, I need to remove a portion of the nut crop to allow the remaining nuts to pack the inside of every shell with kernel. The most efficient way to reduce pecan crop load is to shake the trees when the nuts reach the water stage of nut development. So, ever since the first of August, I've been cutting open Kanza nuts to check on their kernel development.  

    Today, the nuts hit the water stage (photo above, right). It was time to shake trees.

   For summer tree shaking I use a 3-point hitch tree shaker equipped with doughnut pads (photo at left). When shaking trees in mid summer it is important to use a doughnut pad shaker to help prevent shaker damage to the bark. I also lubricate the inside of the rubber flap that covers pad with silicone lubricant. The goal is to allow the rubber flaps to slip and not the bark off the trunk of the tree.

     Shaking trees for crop load regulation is somewhat of an art. The duration and intensity of the shake largely determines how many nuts are removed. Starting on the first tree, I shake only lightly. Getting off the tractor, I visually inspect how much I've removed. I never look at the nuts on the ground only the nuts left in the tree. If I haven't removed enough, I'll shake the tree again. My goal is to get between 60 and 70%  of the terminals bearing nuts. 

    Once I've shaken a few trees. I get the feel for how much to shake the rest of the trees in the orchard. This year, I was somewhat surprised how easy it was to remove nuts. I had to make sure to use a light touch on the throttle or else I would remove too many nuts. Shaking my entire Kanza block (10 acres) took just a couple of hours.

Monday, August 3, 2020

Pecan bark graft - The first year in pictures

25 April 2020, Bark graft set

   This year, I decided to photograph the growth and training of one bark graft that I made this Spring. I'll be adding to this post as the season progresses so you can see every step I take in training the scion and pruning back the under-stock. The process began this year with a bark graft placed on a young tree on April 25th (photo at right).


17 May 2020, Bud swell

Three weeks after grafting, buds on the scion start to swell and green up (photo at right). This is a good sign for graft success. However, remember that there is often enough stored energy within the scion itself to push buds open even if the scion and stock haven't made a strong, growing connection. It is only when I see leaves expanding,  do I known the scion and stock have united fully.


25 May 2020, Leaf Expansion

    Four weeks after grafting, leaves are expanding on the new shoots growing from the scion (photo at right). At this point I am confident I have a successful graft.


1 June 2020, Shoot elongation

    With warm summer temperatures, the new shoots growing from the scion start elongating rapidly (photo at right).  Successful bark grafts usually grow 4-6 feet in height during the growing season.


8 June 2020, Graft training

    By the first week in June the graft has grown to a point where it is time to select one shoot to become the new central leader. In the photo at right, you can see that the scion has developed two strongly-growing shoots that are competing for dominance.
    At this point, I will begin the tree training process to promote the growth of the scion, limit the scion to a single growing shoot (new central leader), and install a larger tree-training stake. These steps are illustrated in the photos below.
Prune back growth below the graft to push scion growth, June 8th
Prune to one scion shoot, trim off top stub to promote healing. June 8th.
Remove tape to prevent girdling, June 8th.
Install 1 x 2 training stake, tie new growth with flagging tape to prevent wind damage. June 8th.


Scion 2 feet tall on 15 June 2020
15 June 2020, Remove stalked buds

    With all the tree's energy focused on a single shoot growth rate is rapid. At this point,  the scion shoot is nearly 2 feet in length. However, rapid shoot growth promotes the formation of stalked buds which lead to the formation of poorly attached lateral branches. My goal in training this scion is to maintain a single, branch-less shoot during this first year of growth. I remove all stalked buds on the scion shoot as they appear during the summer months. The photos below illustrate the appearance and removal of stalked buds.
Stalked buds form on rapidly growing scion (red arrows), 15 June 2020


Scion shoot nearly 3 feet tall on 1 July 2020
1 July 2020,  More tree training

    By the 1st of July, the scion shoot is nearly 3 feet tall. New, upright-growing shoots have sprouted from the lower support limbs that can compete with the scion for light and nutrients. To maintain the tree's focus on growing the scion, I will prune off all upright-growing shoots competing with the scion and prune back the support limbs. To further train the scion shoot, I remove all newly-formed stalked buds and tie the new growth to the training stake. These steps are illustrated below.
  
Remove newly developed stalked buds from the upper portion on scion shoot. 1 July 2020.

Remove all new shoots that are competing with scion. 1 July 2020.

 Prune back support limbs to encourage more scion growth. 1 July 2020.

3 August 2020 scion shoot is now 5 feet tall
3 August 2020, Graft union painting and tree training

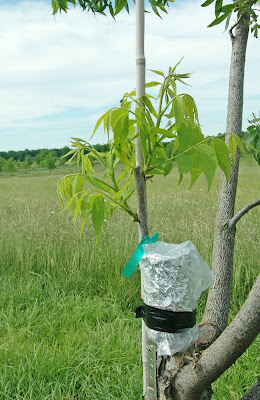
    During early August, I like to remove all the wrappings that cover the graft union and paint that area with white latex paint. By removing the plastic bag and aluminum foil, I can clean out any ant nests that have formed under the protection of the plastic. I use white paint for two reasons. First, to prevent sun-scald on a portion of the tree that has been covered since late April. And second, to mark the site of the graft union for easy identification for years to come.
    While I was attending to the graft union, I also pruned off any and all lateral shoots on the scion that have developed from stalked buds.  I also made just a few pruning cuts to the support limbs to remove low hanging branches. At this point in the season, I limit the pruning back of the support limbs to allow the scion shoot to start slowing down its growth rate. I don't want rapid growth to continue into the fall because that can lead to winter injury of the scion. 

All coverings removed from the bark graft.
Graft union painted white
Lateral shoots growing from primary buds on the lowest portion of the scion shoot will be removed

Stalked buds have developed and sprouted on the upper portion of the scion. These will all be removed.

Bark grafted tree before and after painting and training