
What's even more amazing are the software tools I have on my computer that allows me to edit the digital picture I receive and turn it into an neat instructional aid. I can usually enhance visual clarity of the photo then add words and arrows to point out recommended pruning cuts.
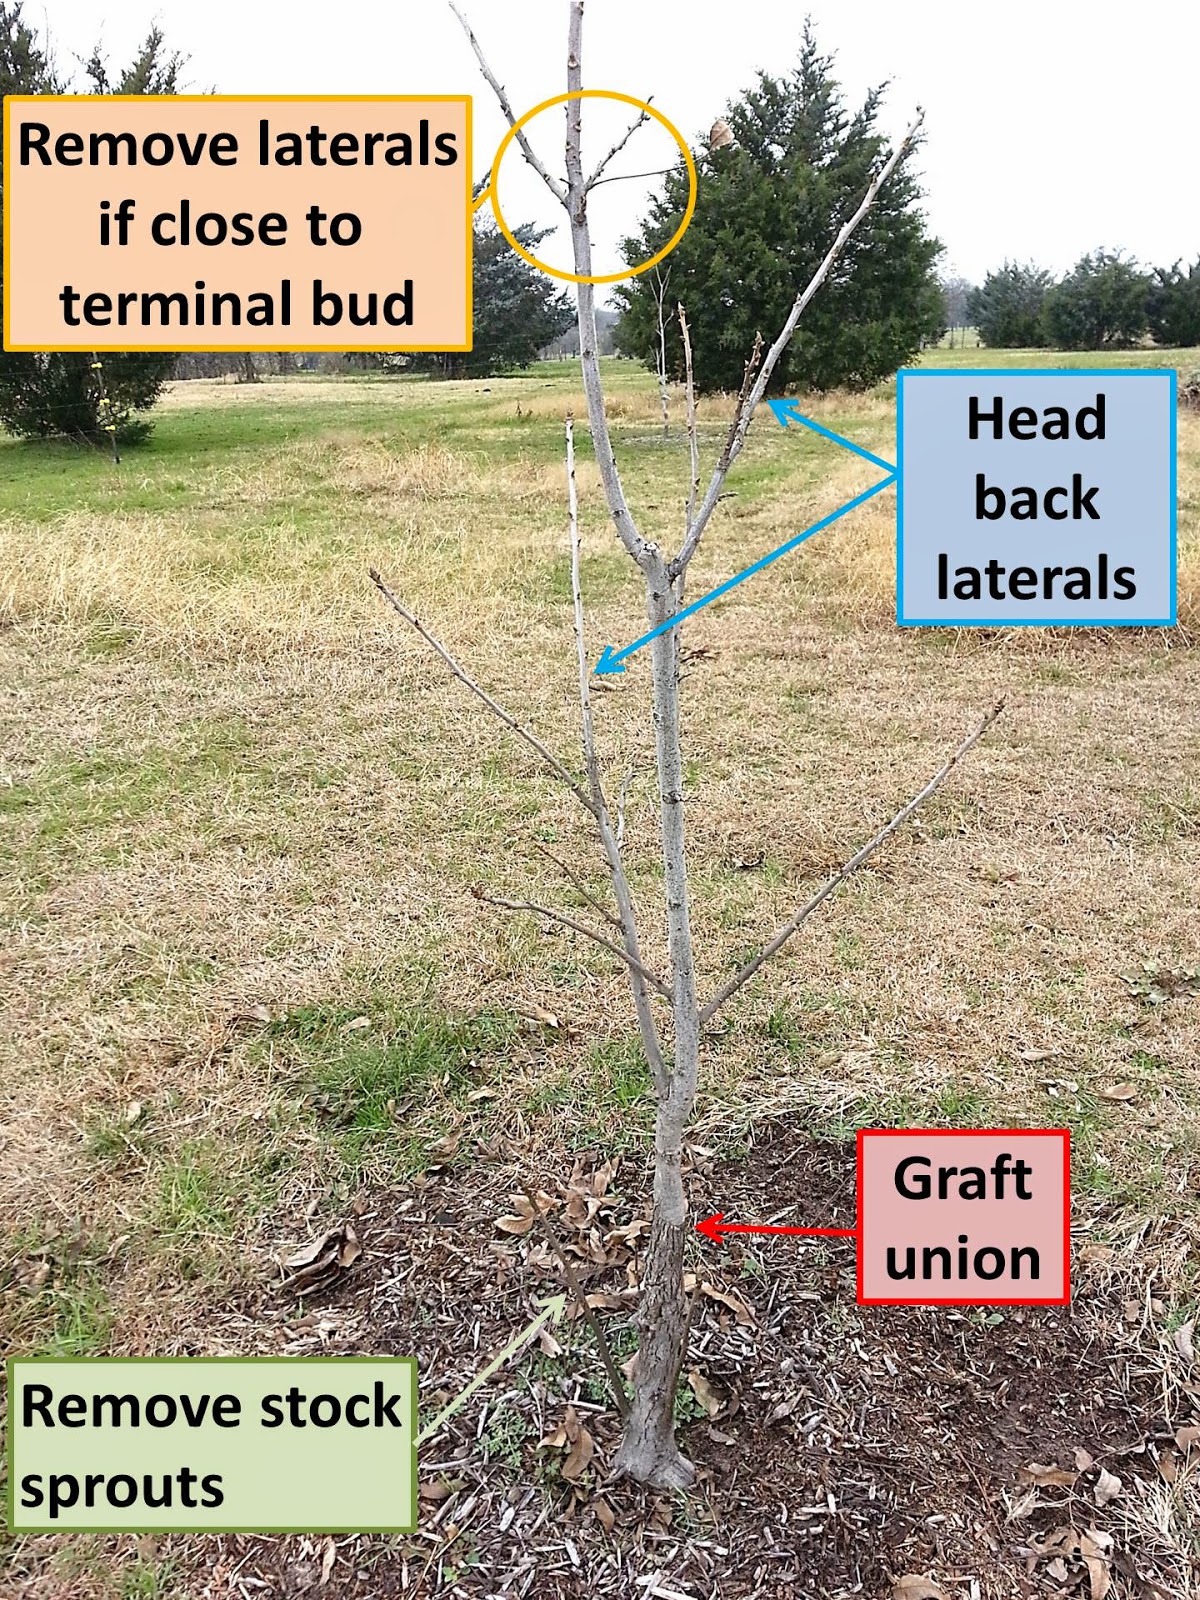
You can clearing see the change in bark texture that marks the site of the graft union (red arrow). Below the graft, you can barely make out a stock sprout. Remove this sprout entirely.


Wichita is widely available in South Africa and the profusion of narrow angled branch connections as seen in the upper portion of the photo is characteristic of this cultivar. I'm going to let the tree's owner decide which side of the tree to keep, because in the end it won't really matter to the tree. With that said, I'd probably choose to remove the right fork because when I cut the limb it would have an open space to fall. Cutting the left side would mean placing a large limb on top of the garden wall.

Removing a large limb from a tree is a three cut process (graphic above). In cutting off a large limb you are removing a lot of weight and that falling weight can lead wood splintering or bark pealing. To control the limb removal process, start by making an undercut about 1/3 way through the branch at a point about one foot away from the trunk (cut 1 above). Next, start cutting from the upper side of the limb about one inch further out from the trunk (cut 2 above). Keep cutting until you start hearing wood crack. Stand back and watch the limb snap off the tree under it own weight. Now, with most of the weight pruned off, remove the branch stub just outside the branch collar (cut 3 above). If the limb crotch is wide enough for your chainsaw, you can make the final cut from the top downward. For narrow crotches, the final cut with the chainsaw will have to be from the bottom up. For folks experienced in using a chainsaw and know how to avoid saw kick-back, I generally use a plunge cut from the side to remove any angle branch stub.

The lowest side limb on this tree is extremely vigorous and seems to be almost as large as the central leader (red arrow). To promote growth of the main trunk, this limb should be cut back . I've marked the place to cut with a short red. Note that this one cut will remove the upward growing portion of this side limb. What's left is less vigorous and outward growing. In removing this limb, I would use the 3 cut method described above in order to avoid possible bark damage to the remaining portion of the limb.
The yellow arrow points to a side limb that is directly competing with the central leader. The cut I would make here is shown by the short yellow line. Once again, I would remove an upward growing branch pruning it back to outward growing limb.